Workspace groups & permissions
Bundle workspace members into groups and grant them workspace-tier permissions in one place.
Workspace groups let you hand out workspace-level access to a set of people at once instead of adjusting each person individually. A group holds a list of members and a list of permissions; everyone in the group gets those permissions.
A member's effective access is the union of every group they belong to plus whatever their workspace role already grants. Groups only ever add access — they never take away what a role already gives, so putting someone in a group with few permissions does not restrict them.
Prerequisites
- You must be a workspace admin or owner, or belong to a group with the Manage groups permission. Without it the page is read-only: you can see groups, their permissions and their members, but every control is disabled.
- The people you want to add must already be members of the workspace. Invite them from Admin → Members first — pending invitees cannot be added to a group until they accept.
Open the groups page
Go to Admin → Permissions → Groups. The page is a two-pane layout: every group in the workspace on the left, the selected group's details on the right.
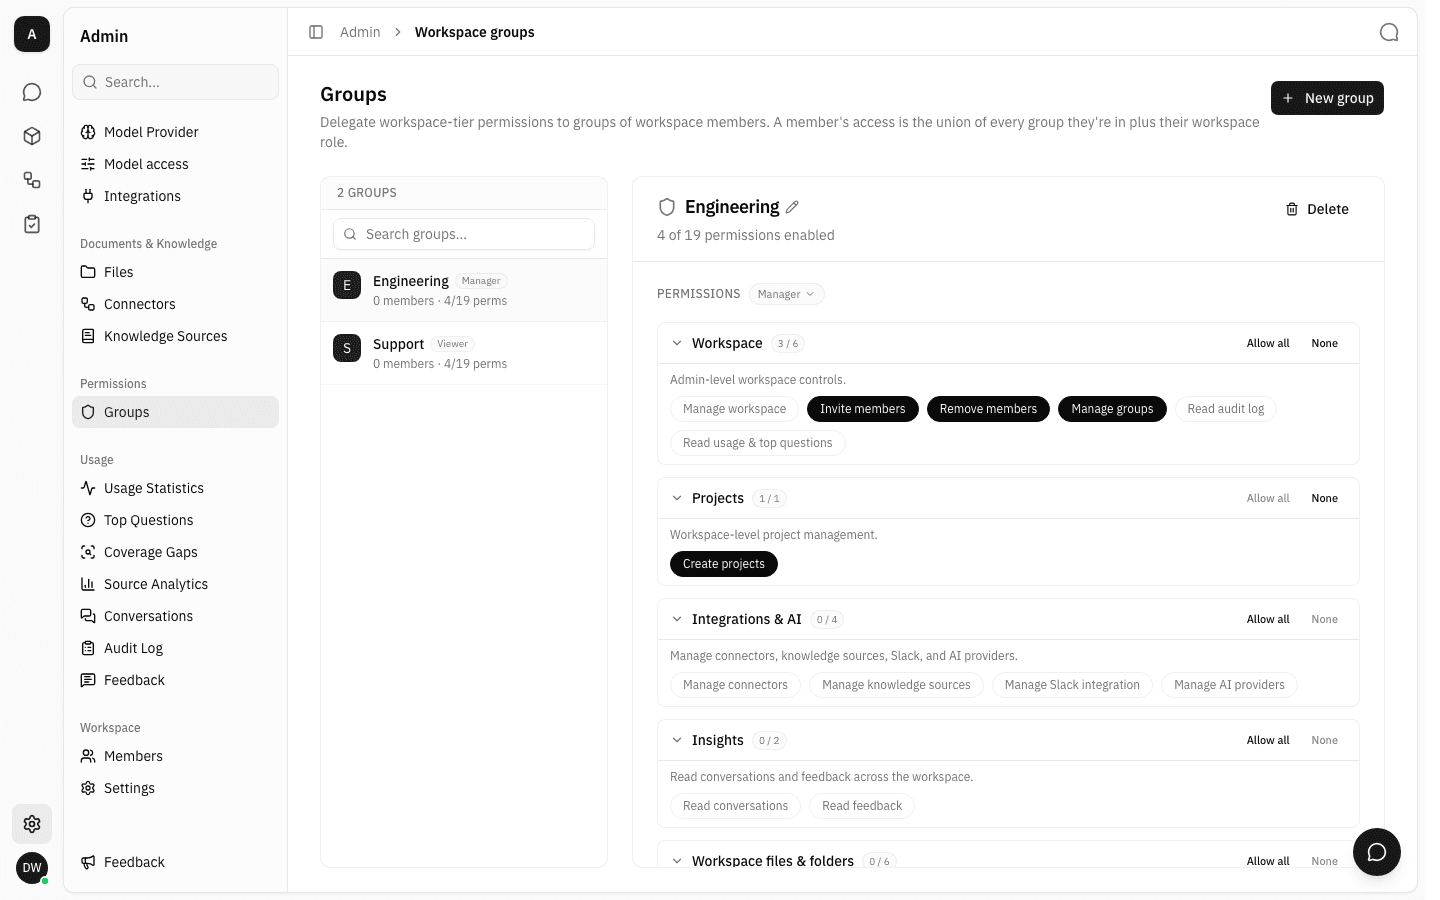
Each row in the list shows the group name, a badge naming the preset its
permissions match (or Custom), the member count, and how many permissions of
the whole catalogue it grants — written as granted/total, so a Manager-preset
group reads 4/19 perms. Use the search box above the list to filter by name
when the list gets long.
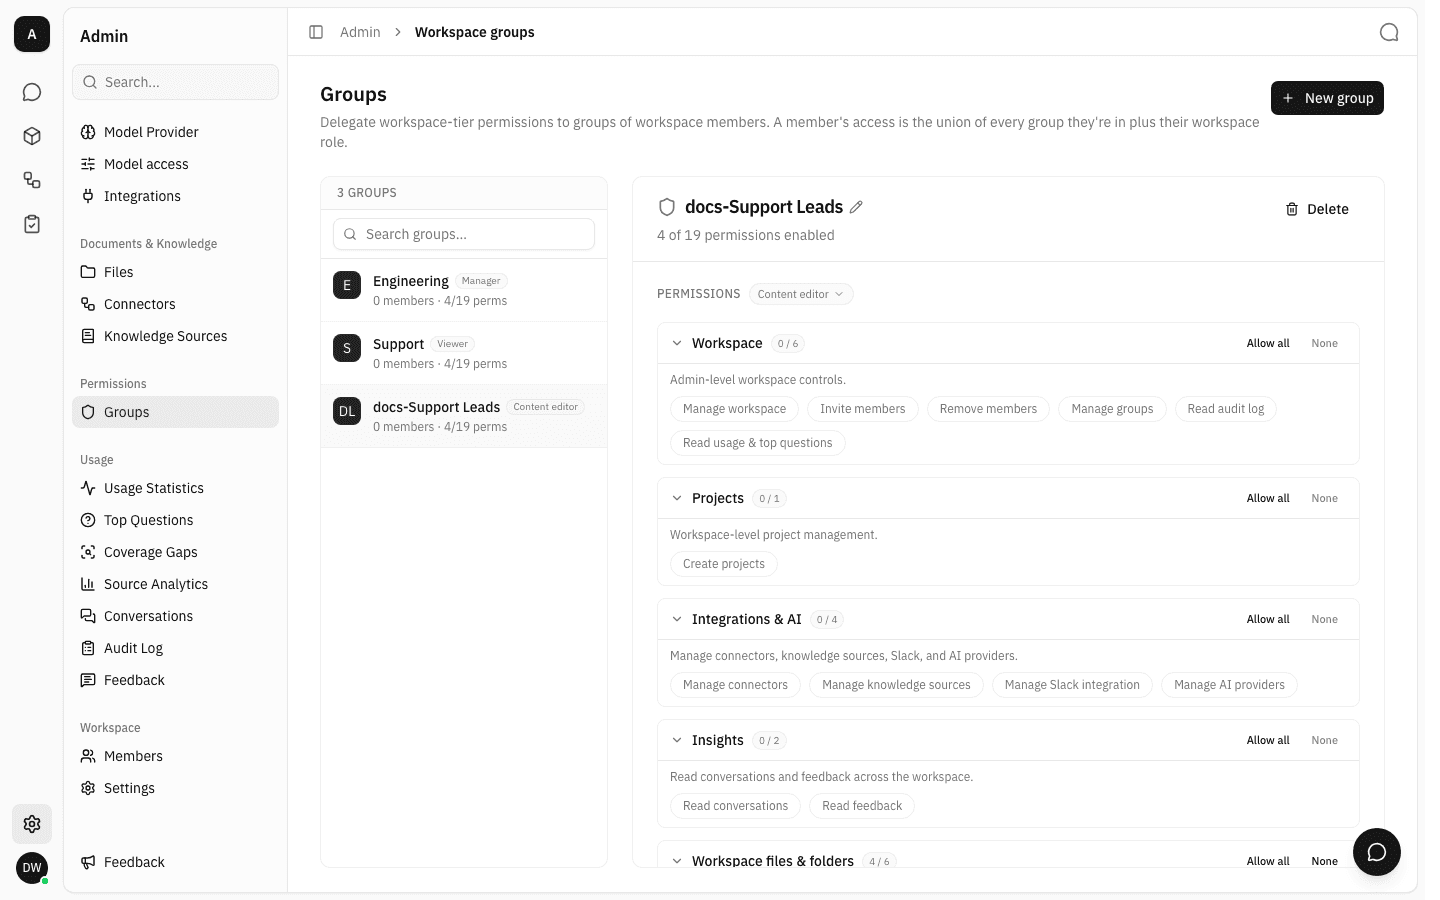
The detail header repeats that count in words — 4 of 19 permissions enabled — and it tracks whatever is currently on screen, so it moves as soon as you toggle a permission and before you save.
Create a group
-
Click New group, give the group a name, and confirm with Create group. Names are just labels — pick something that describes the job the group does. The screenshots below use a group named
docs-Support Leads.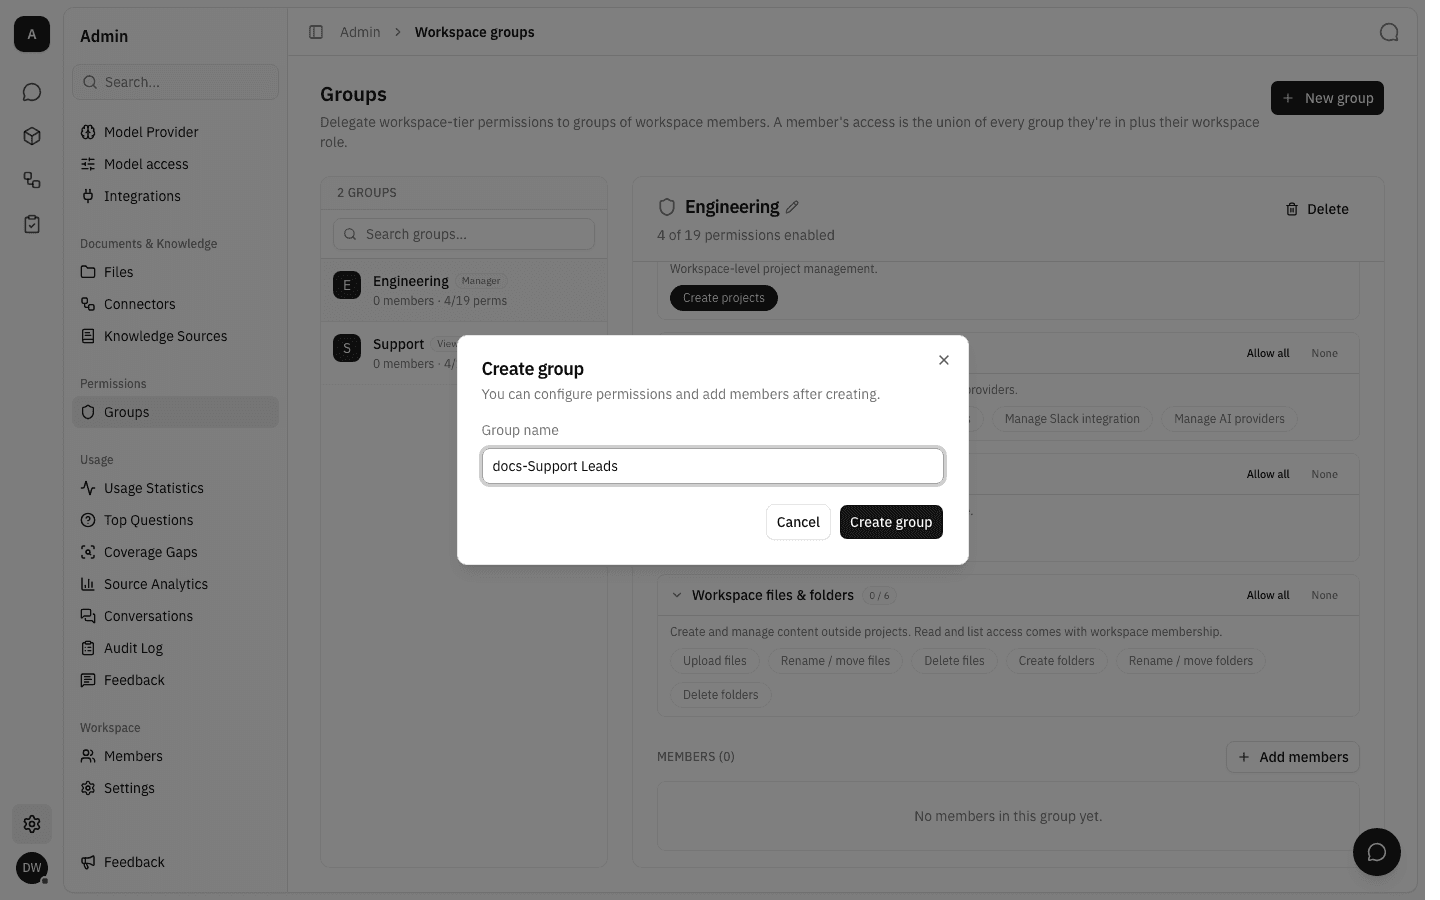
-
The new group appears in the list on the left with Custom, no members and nothing granted. Creating it does not select it, so click the new row to open it in the detail pane.
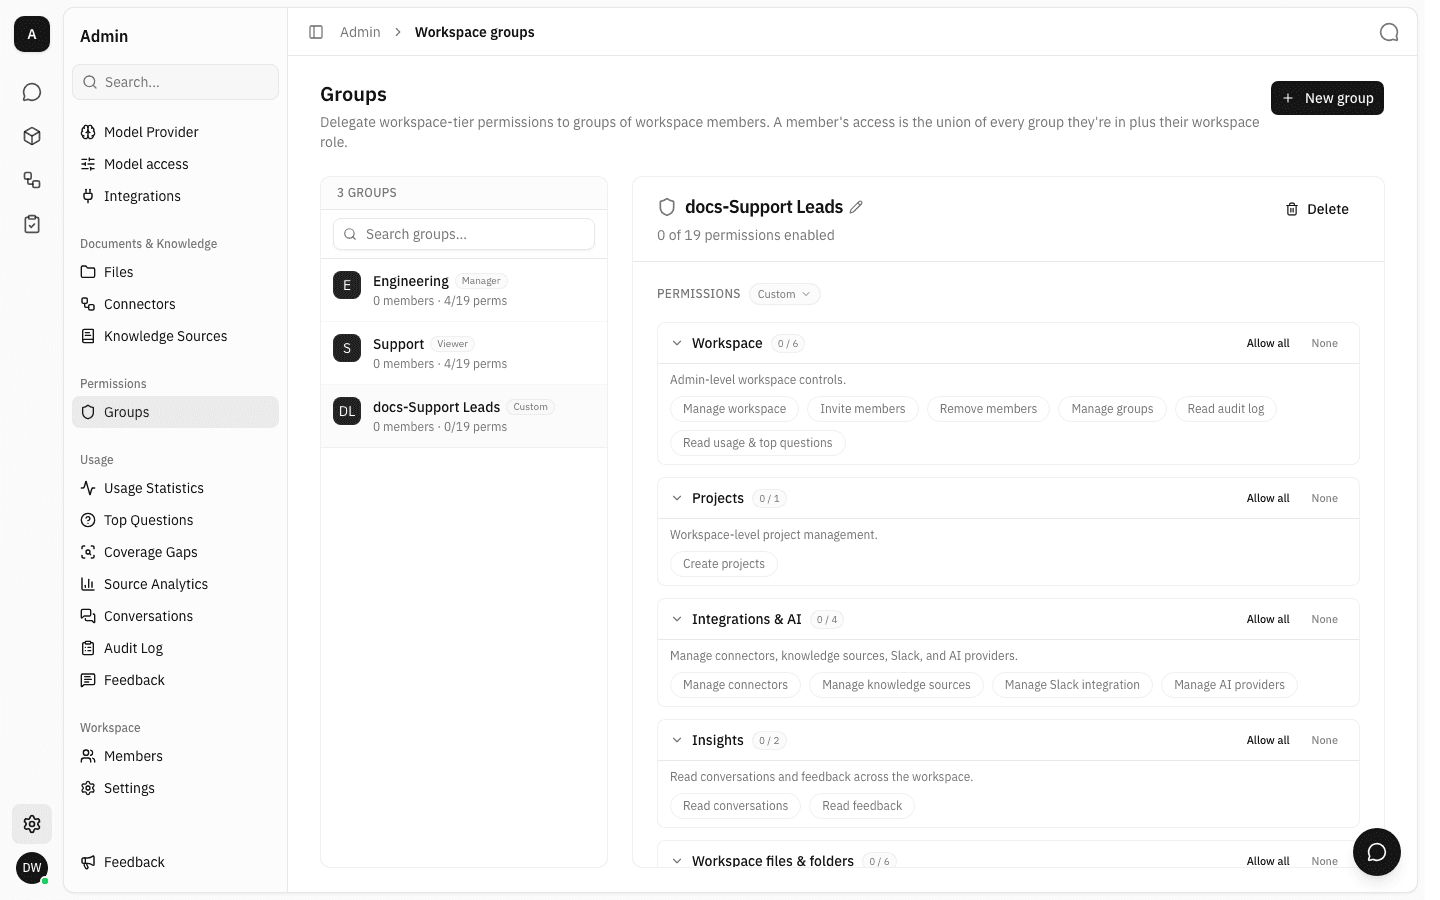
Nothing has been granted yet — a group only takes effect once you turn permissions on and add people.
What a group can grant
Permissions are organised into five scopes. Each one is collapsible and carries
its own granted/total counter, plus Allow all and None shortcuts that
toggle the whole scope at once.
| Scope | What it governs |
|---|---|
| Workspace | Admin-level workspace controls: manage the workspace, invite members, remove members, manage groups, read the audit log, read usage and top questions. |
| Projects | Creating projects at the workspace level. |
| Integrations & AI | Managing connectors, knowledge sources, the Slack integration, and AI providers. |
| Insights | Reading conversations and feedback across the workspace. |
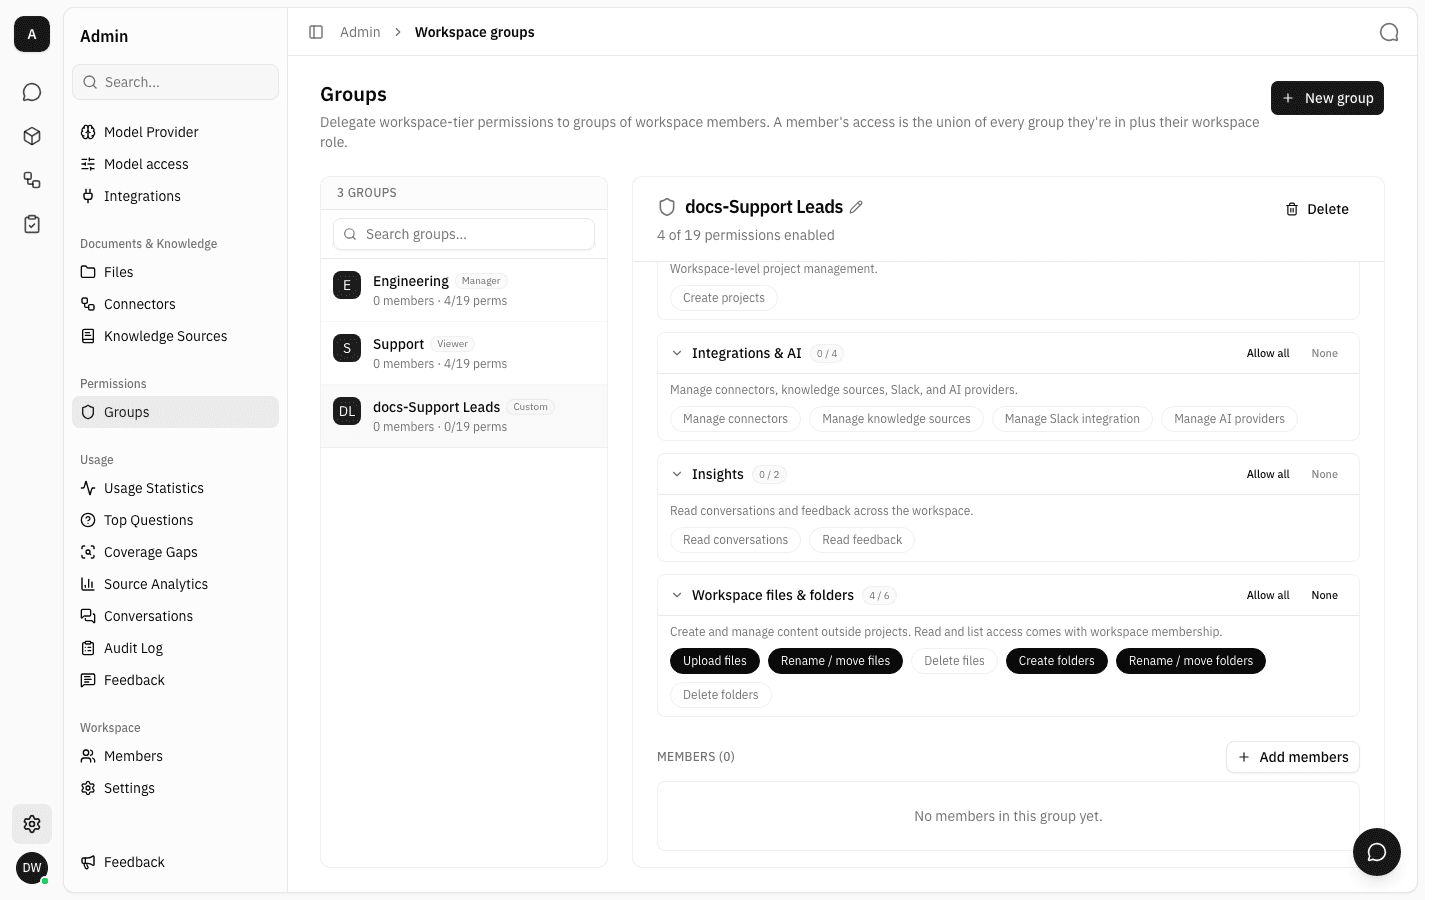
| Workspace files & folders | Creating and managing content in the shared library outside projects: upload files, rename or move files, delete files, and the same three for folders. |
The counts in the screenshots on this page are a snapshot: at the time of writing the catalogue holds 19 permissions across these five scopes. The totals in the UI are generated from the catalogue itself, so they rise on their own as new permissions ship — trust the number on screen over the number here.
Workspace files & folders
This scope is the one that decides who may change the shared library at Admin → Files. Reading is not in it: opening folders, searching and downloading come with workspace membership, so an ordinary member already has them. What the scope hands out is the write side, split finely enough to give someone exactly as much as they need — you can allow uploading and organising without allowing deletion.
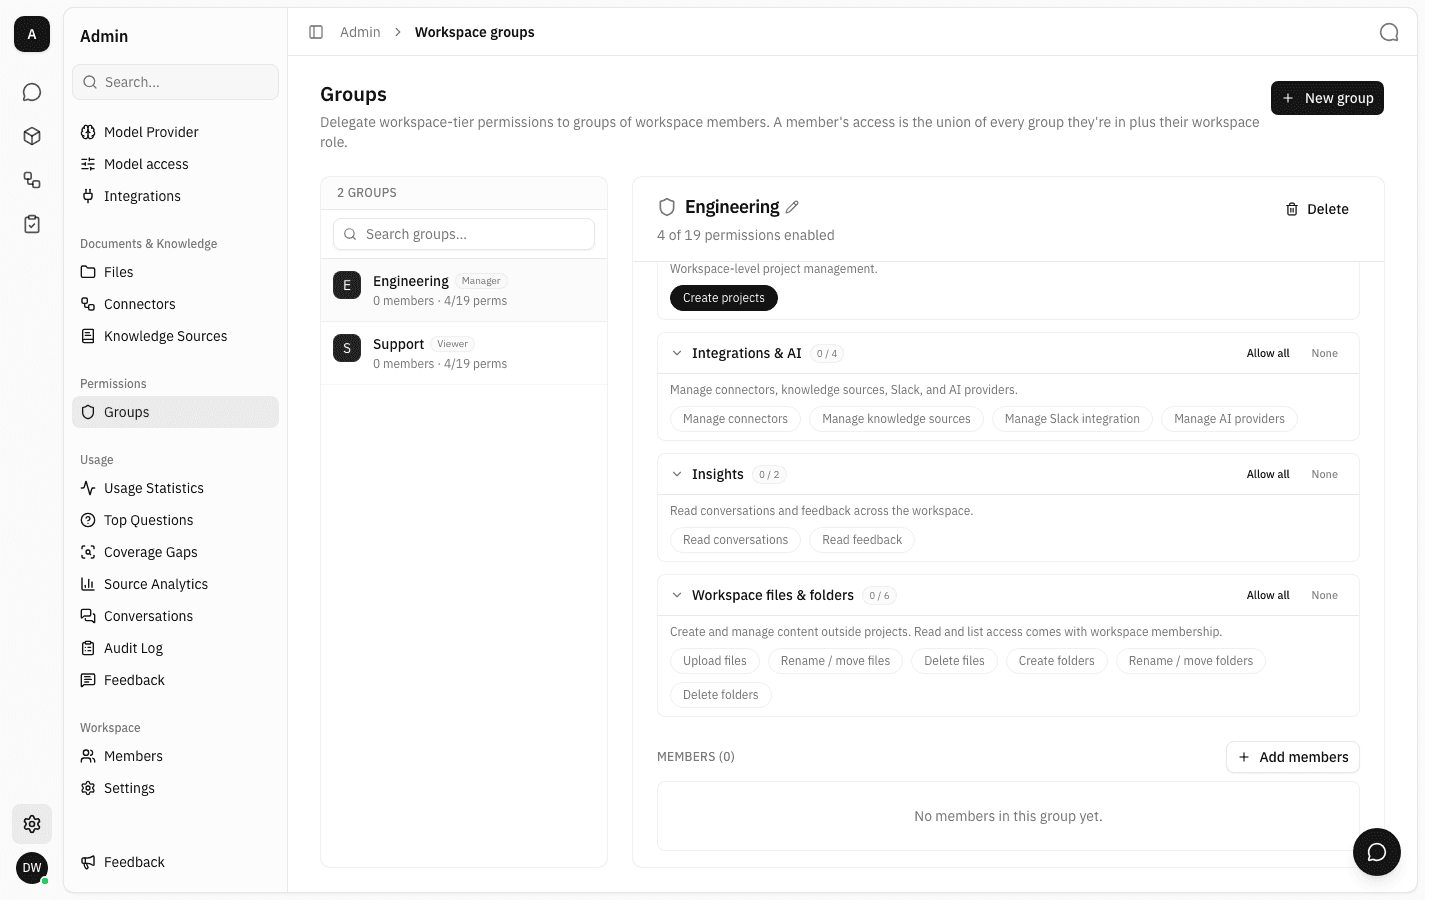
Until a member gets one of these permissions from a group, the create and edit controls on the Files page are simply absent for them. See Workspace files for what each control does.
Grant permissions
-
To fill in a whole set at once, open the preset menu next to PERMISSIONS and pick one of the four presets.
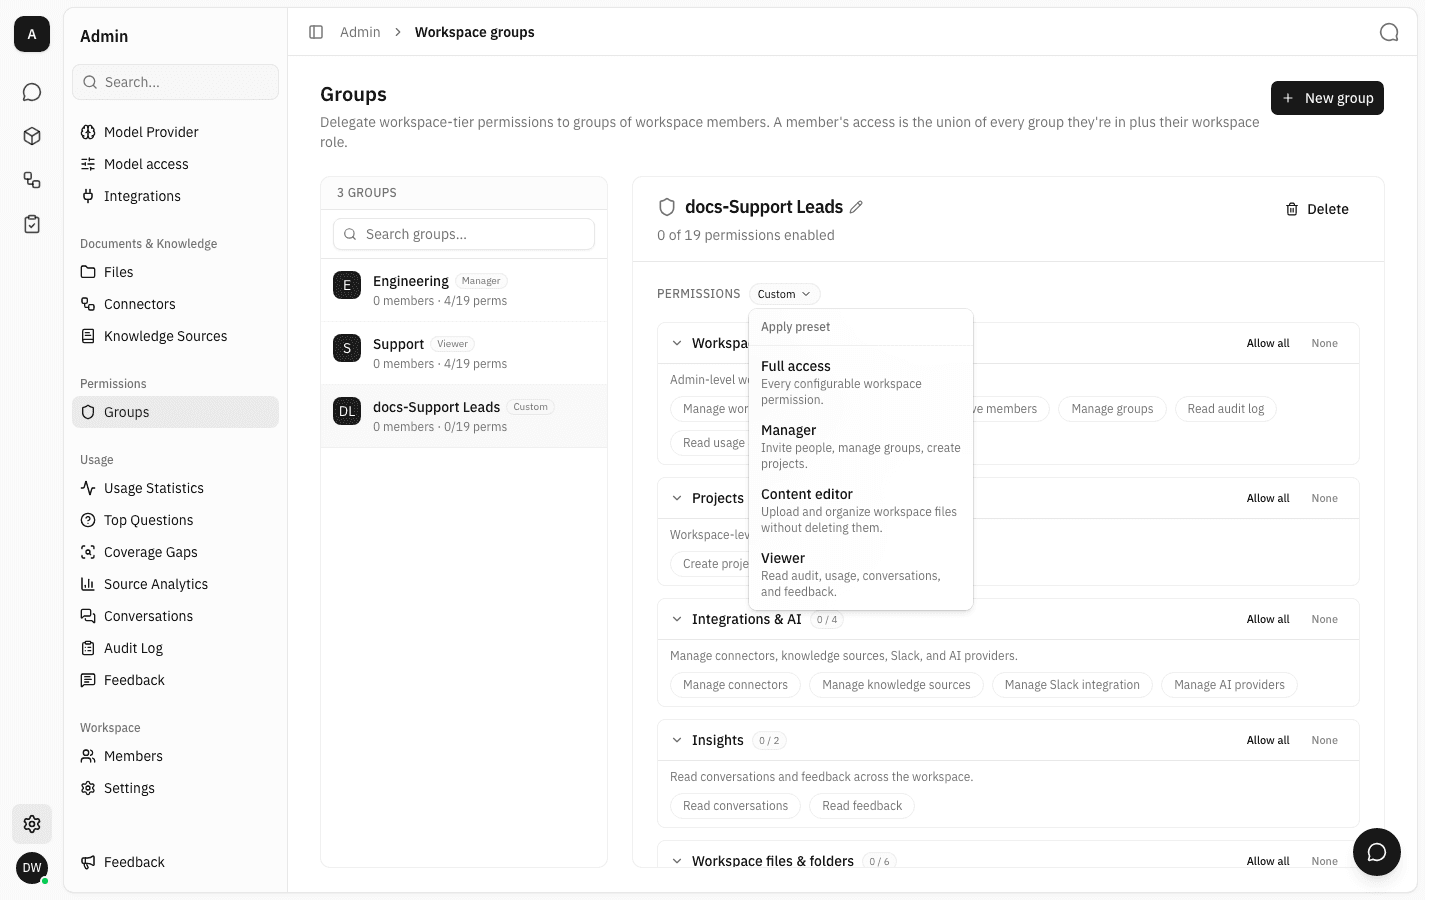
Preset Grants Full access Every permission in the catalogue. Manager Invite members, remove members, manage groups, create projects. Content editor Upload files, rename or move files, create folders, rename or move folders — the files scope without the two delete permissions. Viewer Read audit log, read usage and top questions, read conversations, read feedback. A preset replaces the whole selection rather than adding to it. Presets you could not grant yourself are greyed out: you cannot use a group to hand out access you do not hold.
-
Applying Content editor fills in four of the six file permissions and leaves the rest of the catalogue untouched.
-
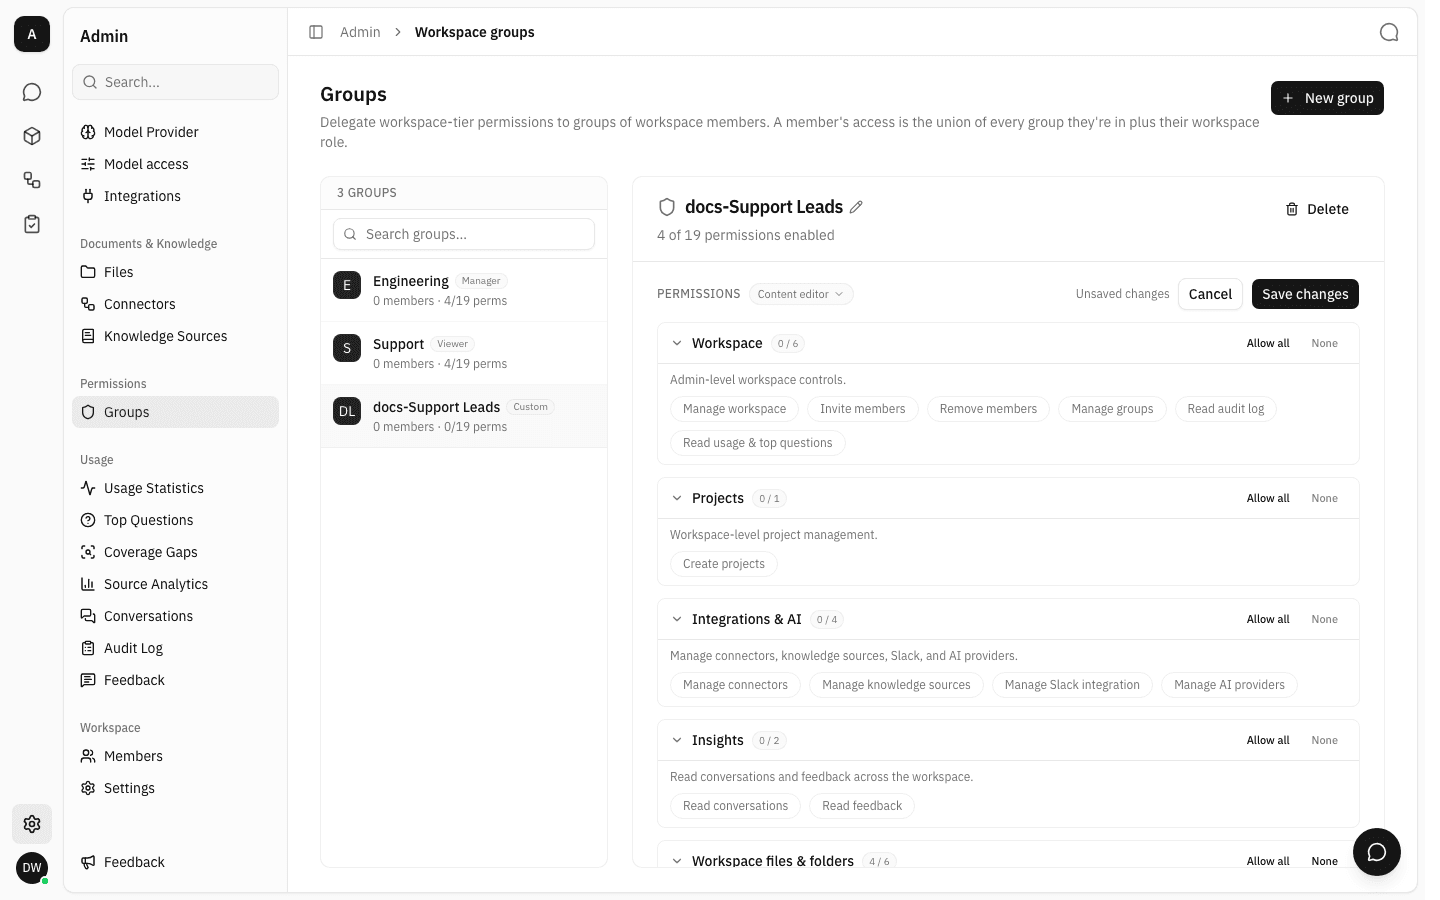
Adjust individual permissions by clicking the pills — filled means granted, outlined means not. As soon as the draft differs from what is saved, an Unsaved changes marker appears with Cancel and Save changes. The badge next to PERMISSIONS names the preset the draft matches, or switches to Custom once it matches none of them.
-
Click Save changes. The marker clears and the group's row in the list picks up the new count and preset badge. Nothing is applied until you save — the page warns you if you try to navigate away with unsaved edits, and Cancel throws the draft away.
Add and remove members
-
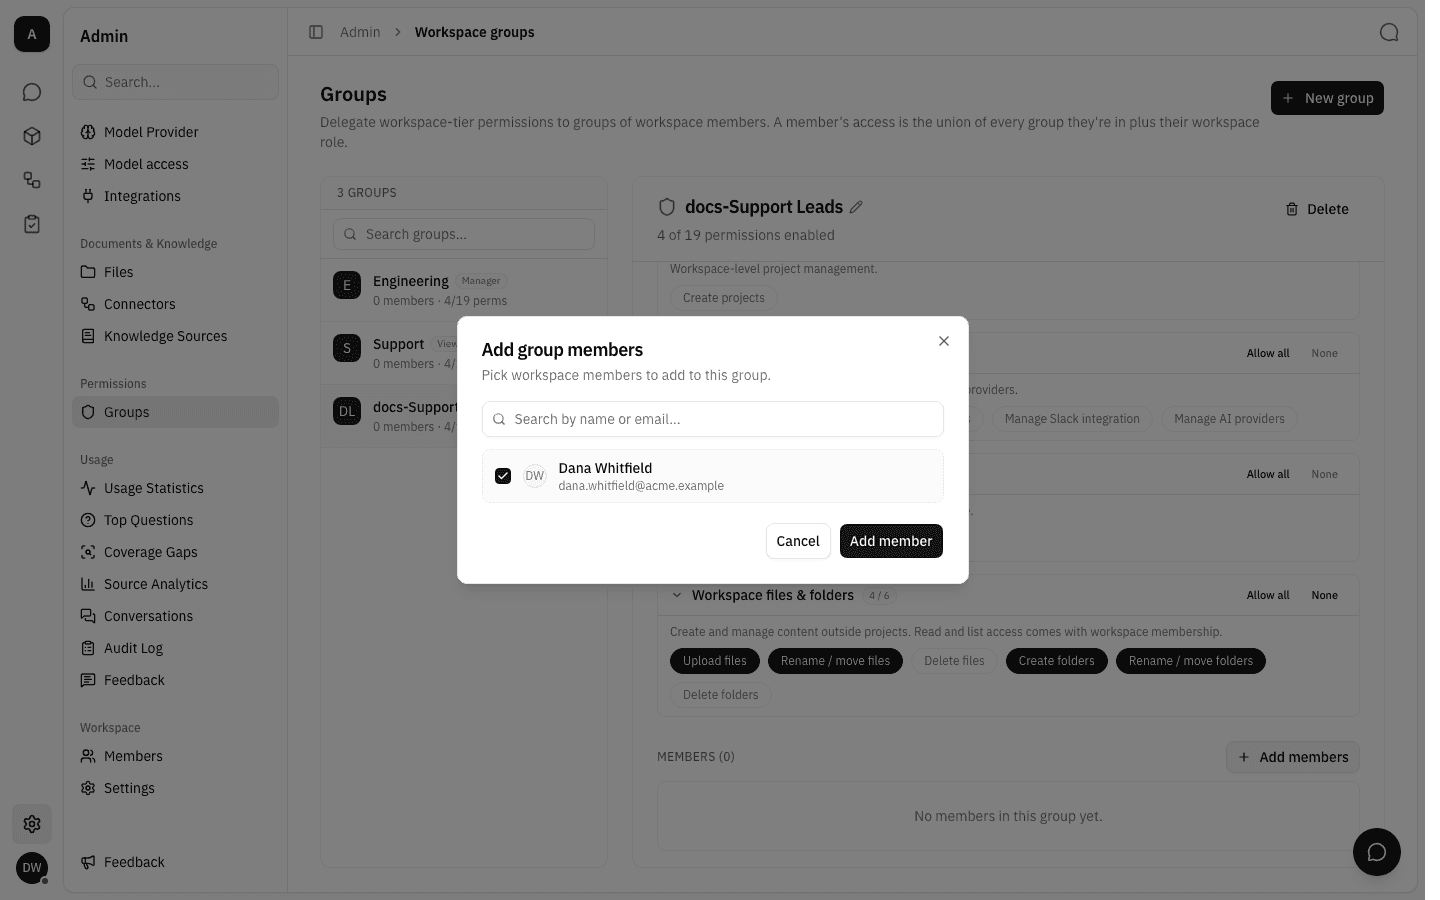
Scroll to the MEMBERS section at the bottom of the detail pane and click Add members. The picker lists every workspace member who is not already in the group; search by name or email and tick everyone you want to add. The confirm button counts your selection, so you can add several people at once.
-
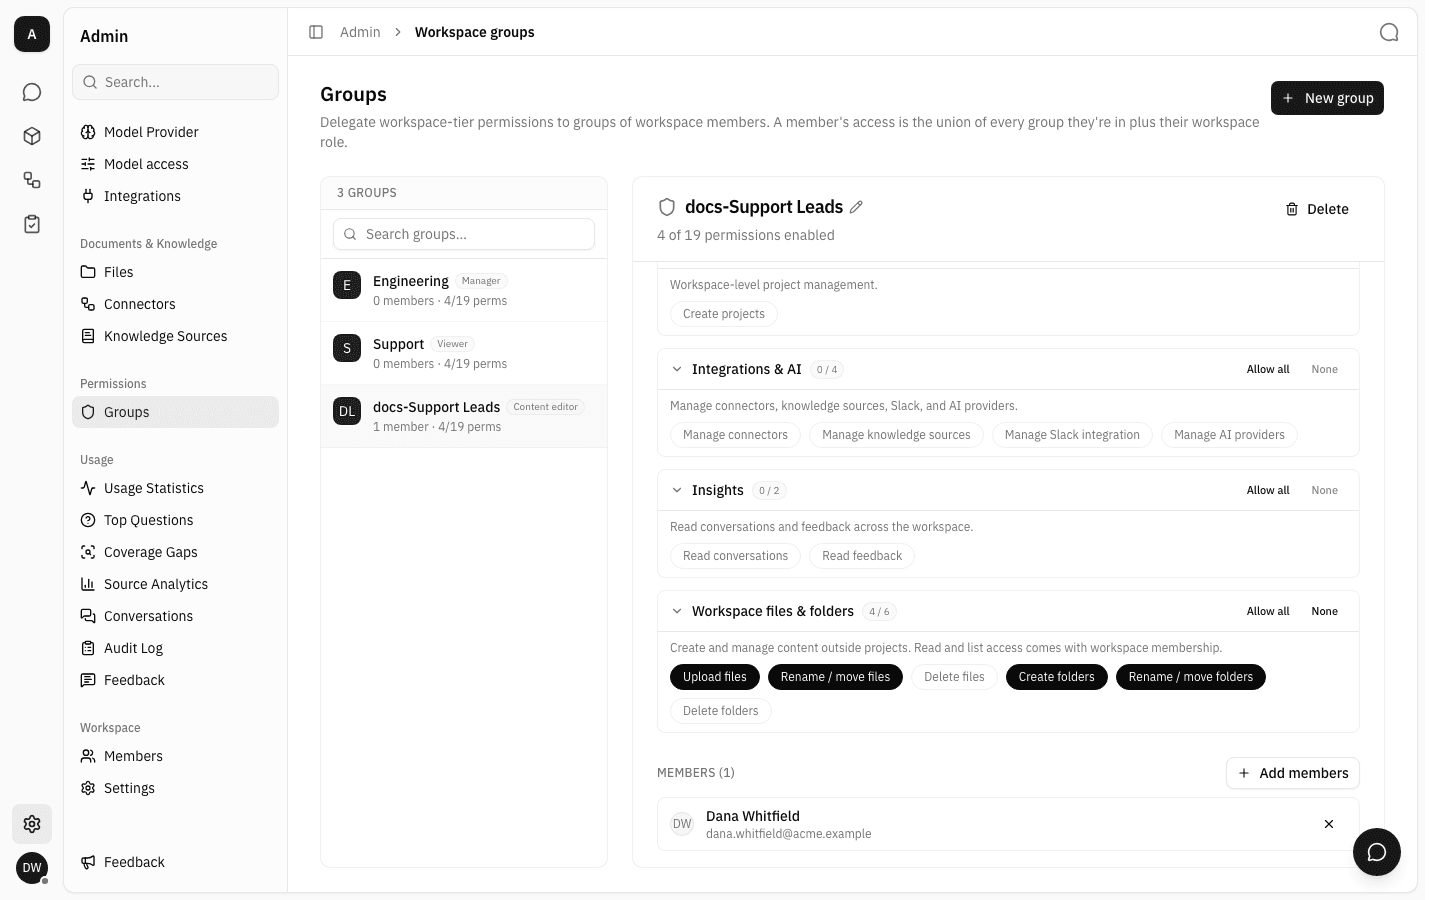
Confirm, and the members appear in the list with the group's permissions now in effect for them. Remove someone with the ✕ on their row — that takes effect immediately and revokes only the access this group granted.
Rename a group
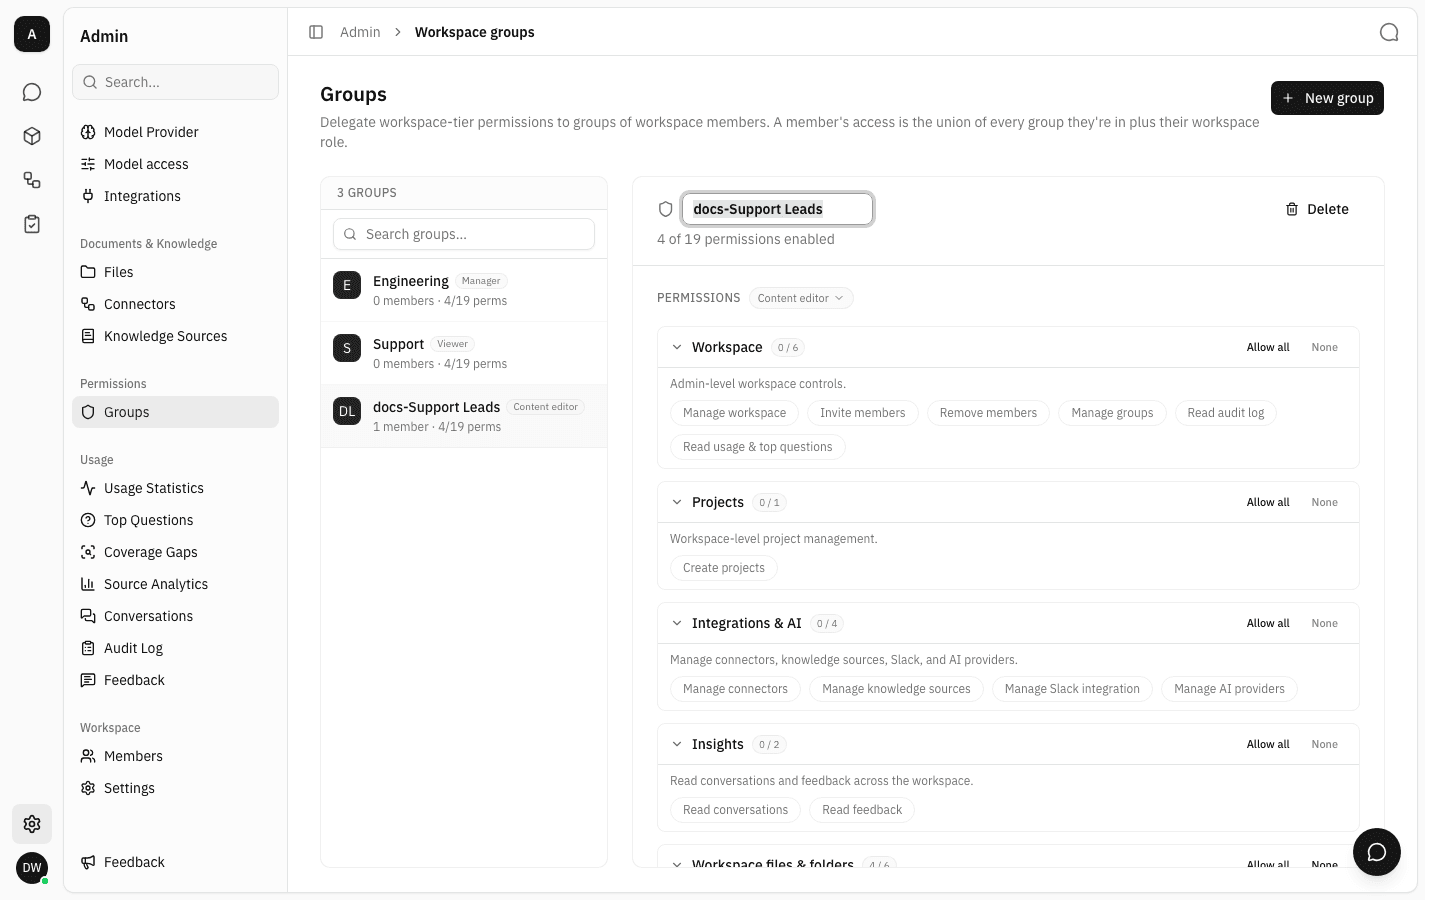
Click the group's name in the detail header, type the new name, and press Enter to save or Escape to cancel. Renaming is a label change only — permissions and membership are untouched.
Delete a group
Click Delete in the detail header. If the group has members, the dialog lists them under AFFECTED MEMBERS and asks you to confirm you understand their permissions will be revoked; you have to tick that box before the Delete group button becomes available.
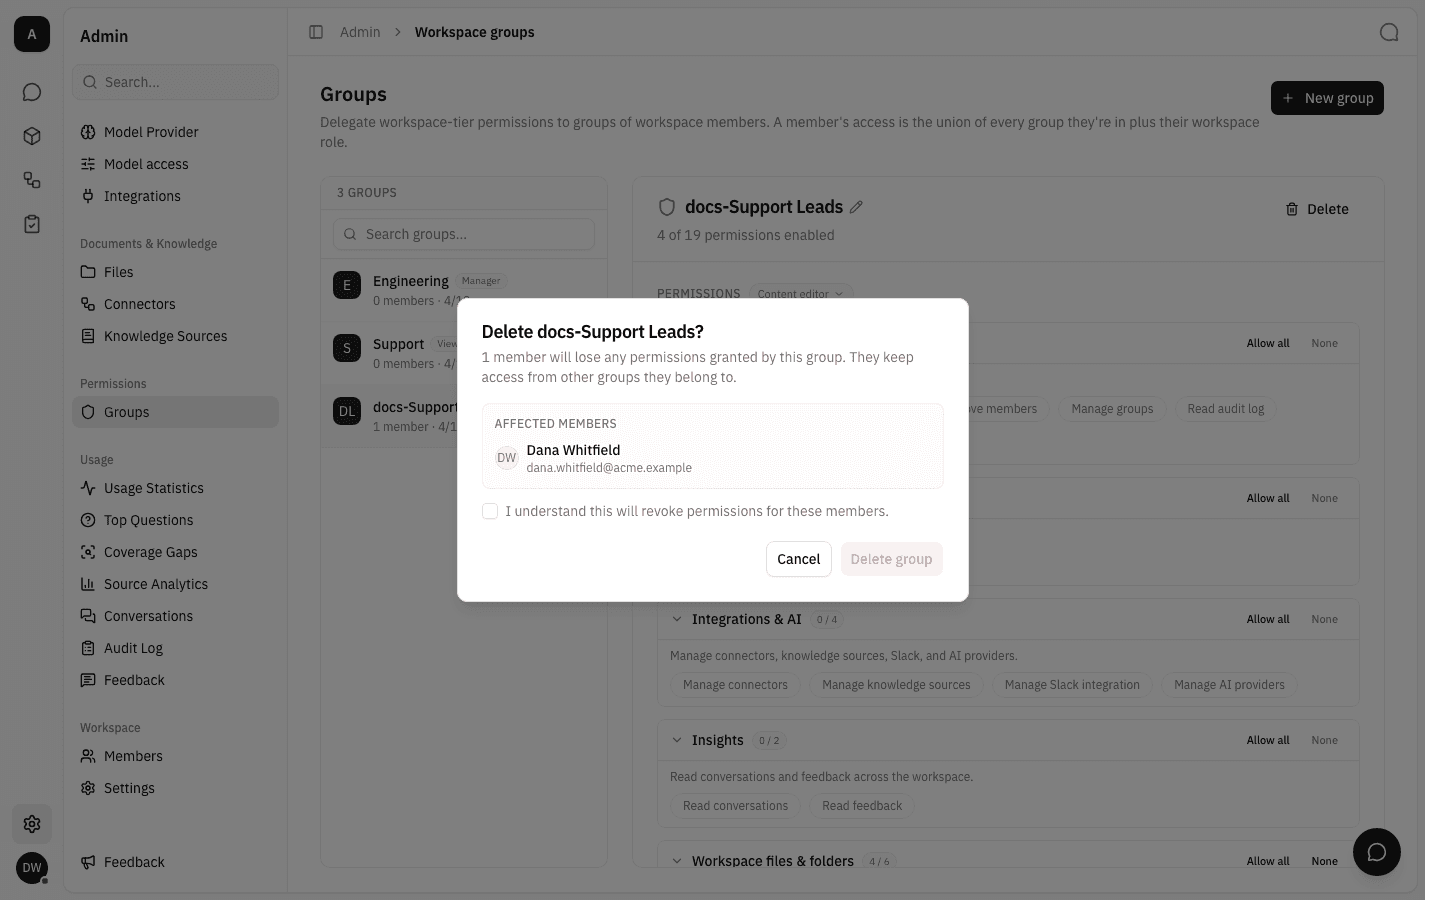
Deleting a group removes only the access that group granted. Members keep everything they get from their workspace role and from any other group they belong to.
Notes
- Groups on this page grant workspace-tier permissions. Access inside an individual project is a separate catalogue, managed in that project's own groups — see Project groups.
- Because access is a union, a person in several groups gets every permission any one of those groups grants. To take access away you have to remove it everywhere it is granted, including their workspace role.
- Permission edits are batched: toggling pills only changes a local draft, and nothing reaches other members until you click Save changes. Member additions and removals, by contrast, apply immediately.
- You can only delegate what you hold. A preset or a saved change that would grant a permission you do not have yourself is refused, which is why some presets appear greyed out for non-owners.