Workspace files
Upload and organize the shared document library that everyone in the workspace can use, and that the assistant searches when it answers.
Workspace files are the workspace's shared document library: brand assets, policies, templates — anything the whole team should be able to find. Every member of the workspace can see them, and supported documents are indexed so the assistant can search them when it answers a question.
They are deliberately separate from project files, which belong to one project and are limited to that project's members.
Looking for the Knowledge Base?
This page used to be called Knowledge Base. Old links still work — they now open Files.
Who can do what here
Reading is open to the whole workspace; changing things is not. Files appears in every member's Admin sidebar, and every member can open folders, search, and download — that much comes with workspace membership.
What differs is the write side:
- Owners and admins get everything on this page from their role alone — upload, create folders, rename, move, delete. No extra setup.
- Members are read-only by default. The New folder and Upload buttons do not appear for them, and neither do Rename, Move to… and Delete in a row's menu. Nothing is greyed out or refused — the controls are simply absent.
To let a member manage workspace files, grant the permissions from the Workspace files & folders scope to a workspace group they belong to. That scope splits the work finely — upload files, rename/move files, delete files, and the same three for folders — so you can hand out exactly as much as the person needs. Role and group permissions add together, so a grant only ever widens what someone can do. See Workspace groups and permissions for how to set one up.
One extra action is reserved for owners and admins regardless of any group: Who has access, described near the end of this page.
Separately, making uploaded documents searchable needs a working model provider for the workspace. Without one, files still upload and store, but indexing fails.
Open the Files page
-
In the sidebar, open Admin, then Files under Documents & Knowledge.
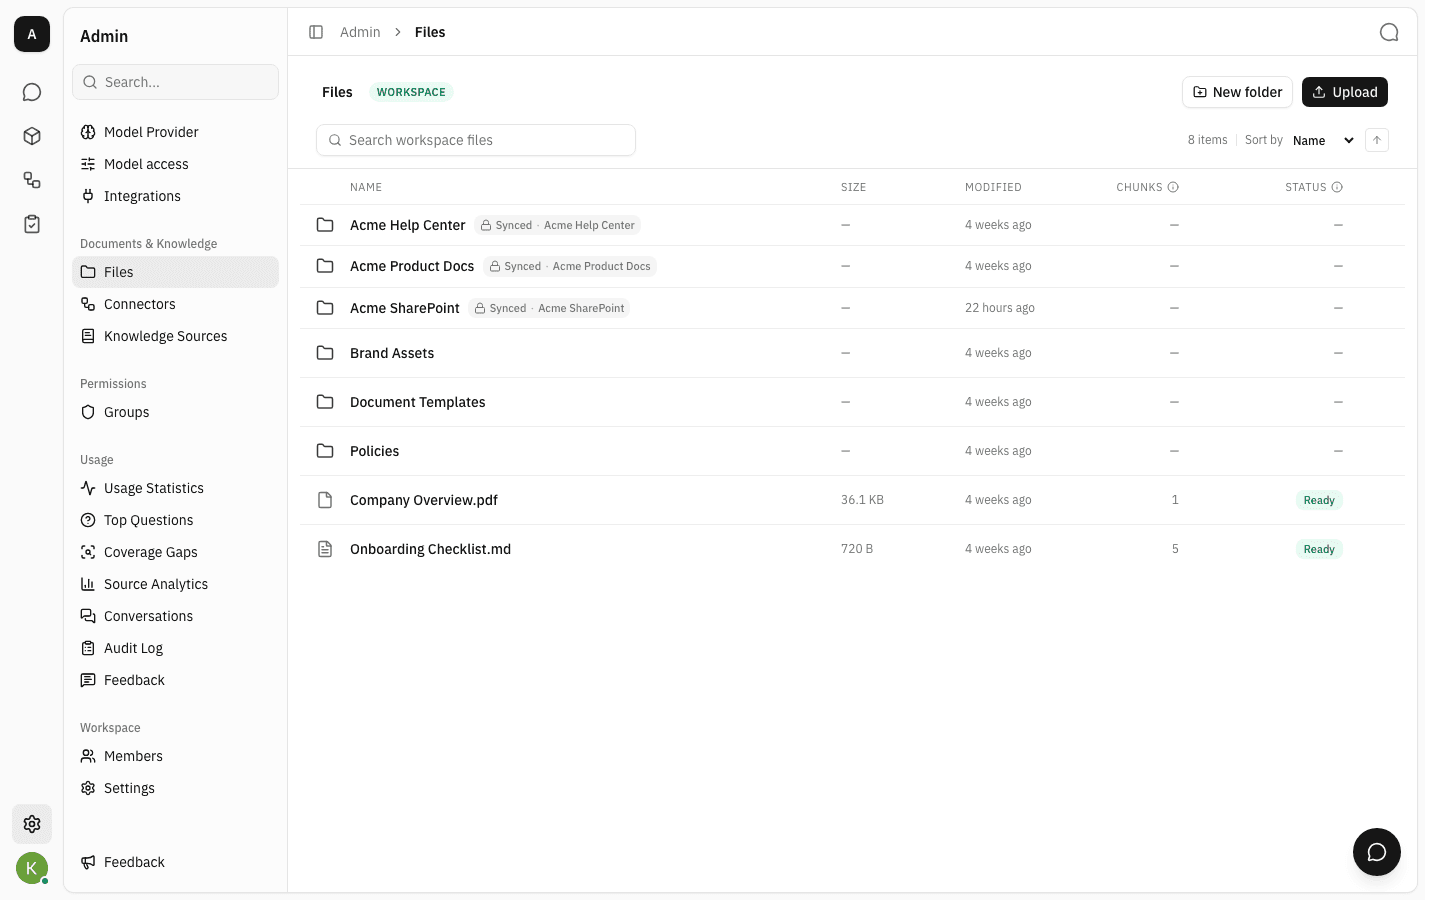
The green Workspace badge next to the breadcrumb tells you which library you are in — the same browser appears inside projects, where the badge reads Project instead.
Upload documents
-
Click Upload and pick one or more files, or drag them from your desktop straight onto the list. Uploading starts immediately, and each new document begins indexing on its own.
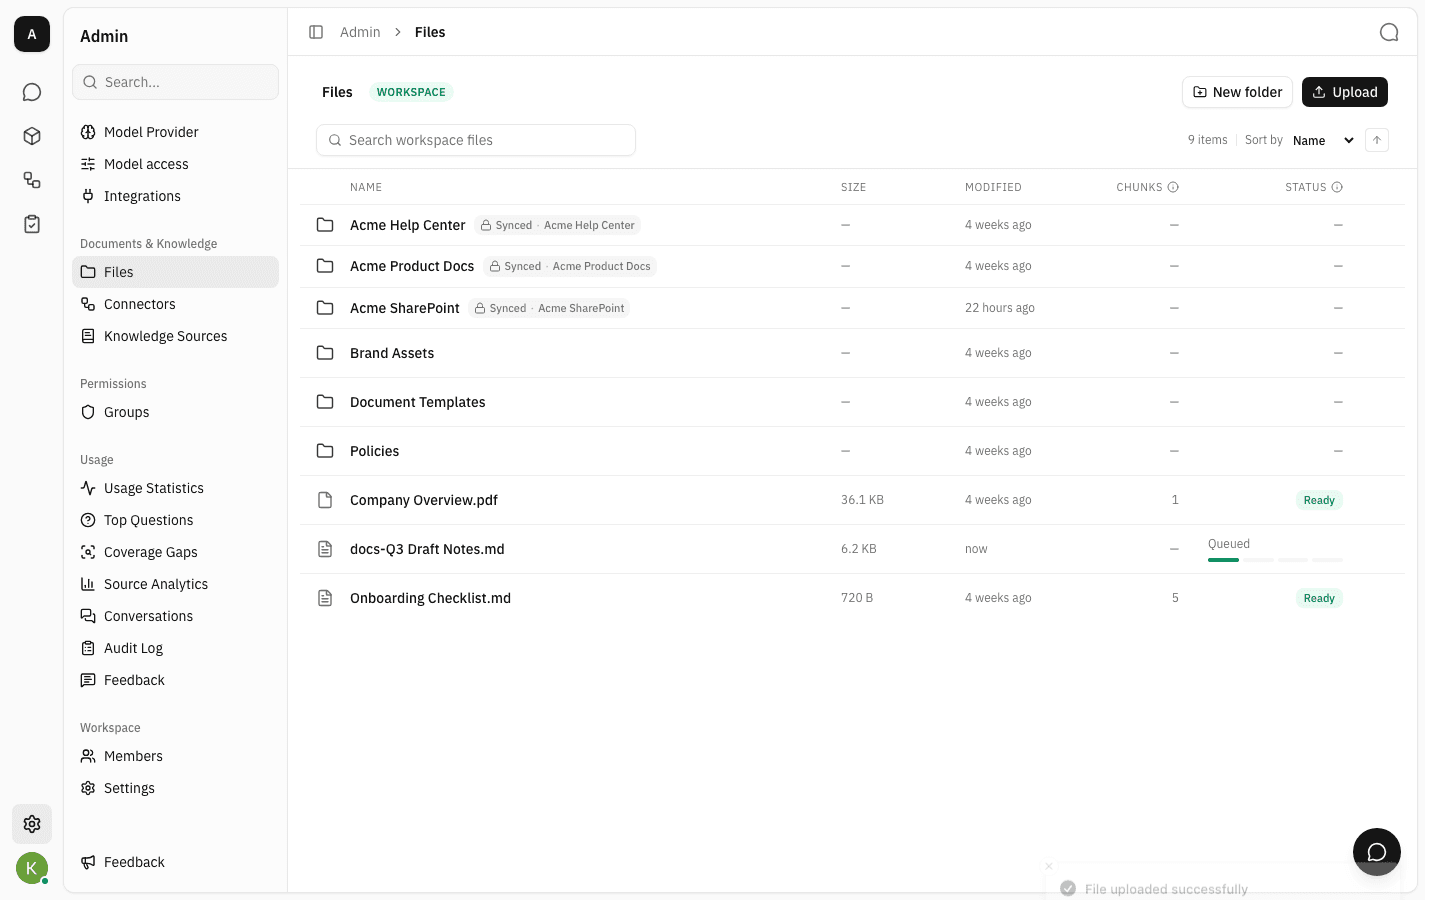
The Status column tracks indexing through four stages — Queued, Extracting, Chunking, Embedding. Small documents pass through in a few seconds; long ones take longer. You can leave the page, indexing continues.
-
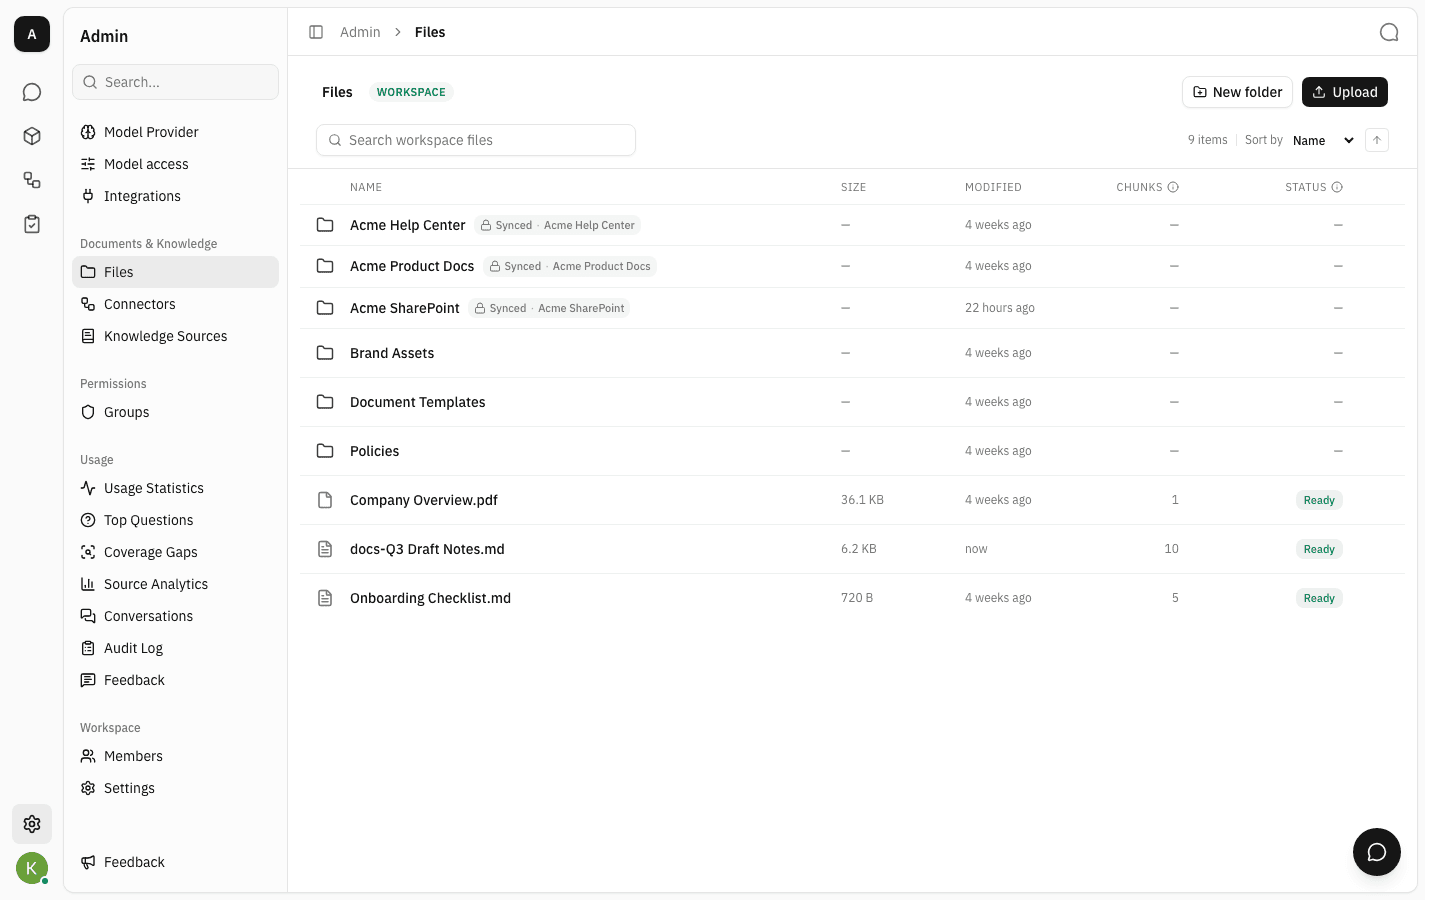
When a document is indexed, its status becomes Ready and the Chunks column shows how many text segments it was split into for search.
-
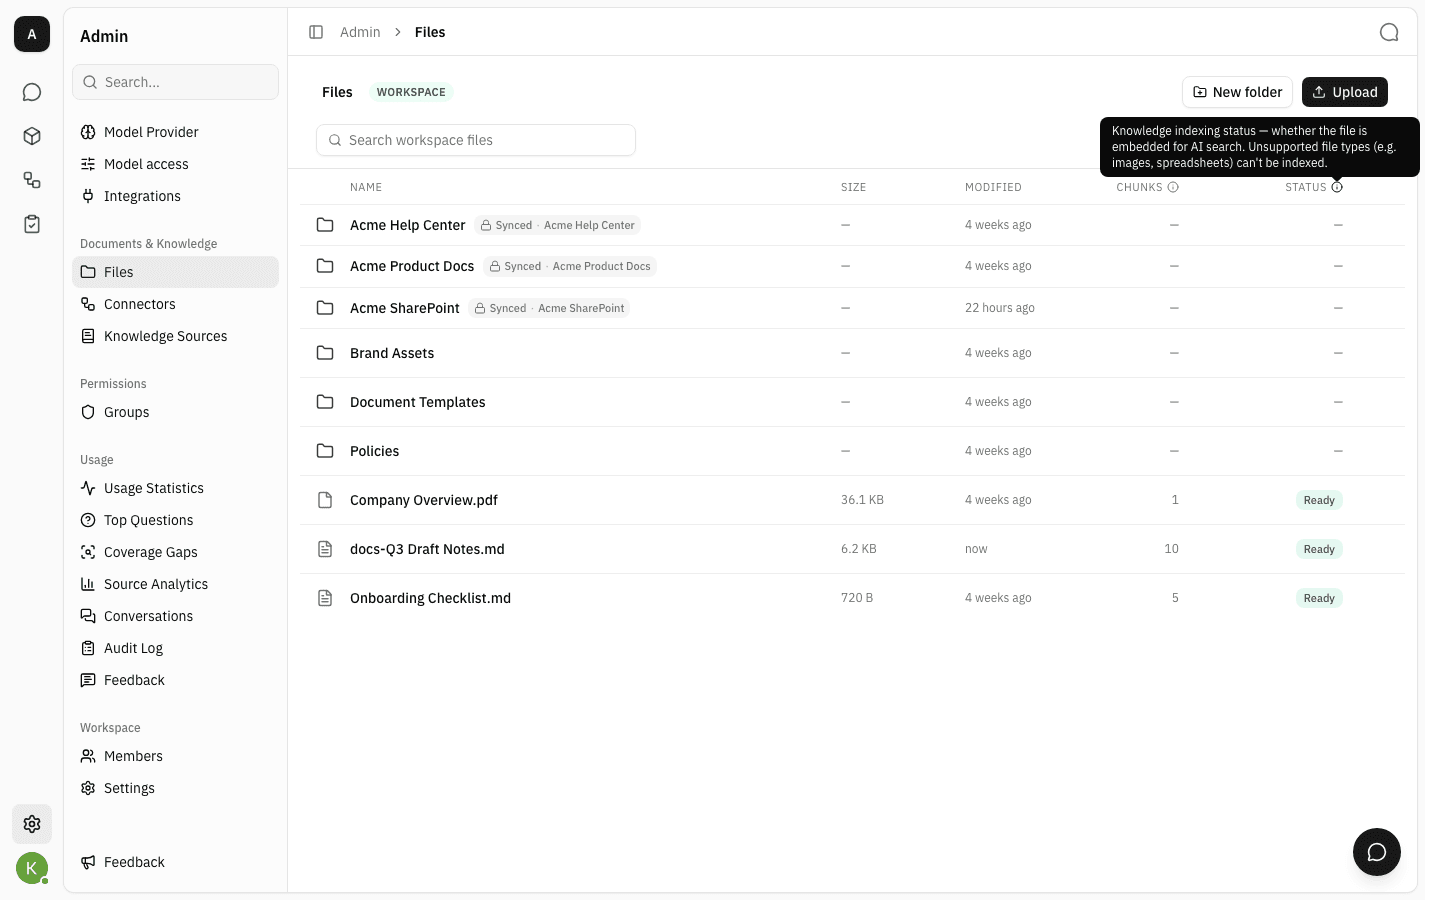
Both column headers carry an information icon that explains what they mean, if you need a reminder later.
Only Ready documents can be found by the assistant. A document that ends in Failed shows a Retry button next to the badge — retrying is safe and is usually all that is needed after a temporary outage.
The row menu
-
Hover any row and open the … menu at its end. This is where every action on a single item lives.
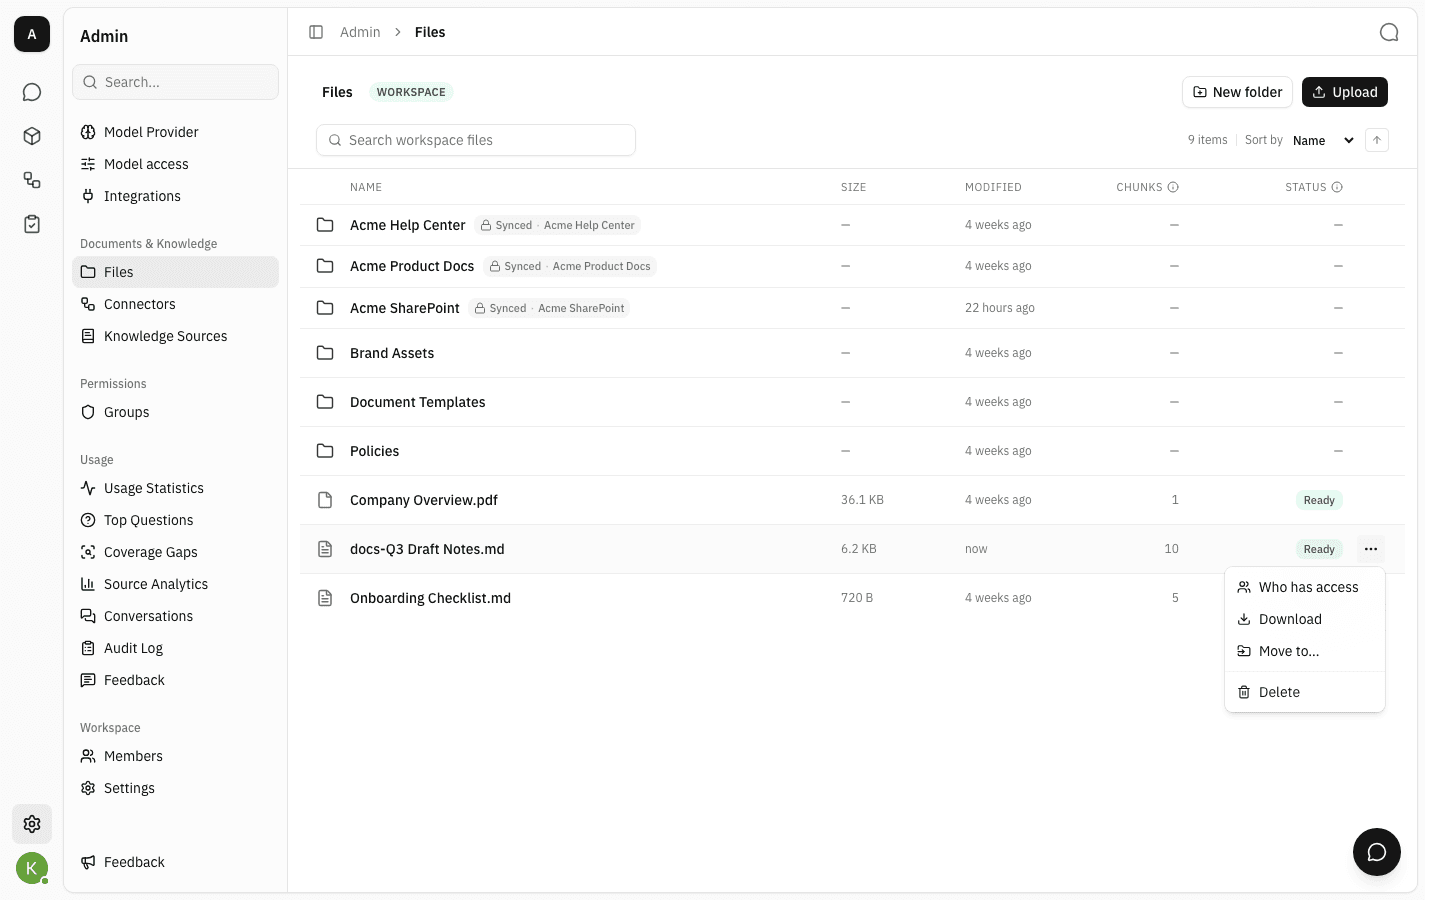
Folders offer Rename, Move to… and Delete; files offer Download, Move to…, Delete and — for owners and admins — Who has access.
Organize with folders
-
Click New folder. The new row appears at the top of the list with its name ready to edit — type the name and press Enter.
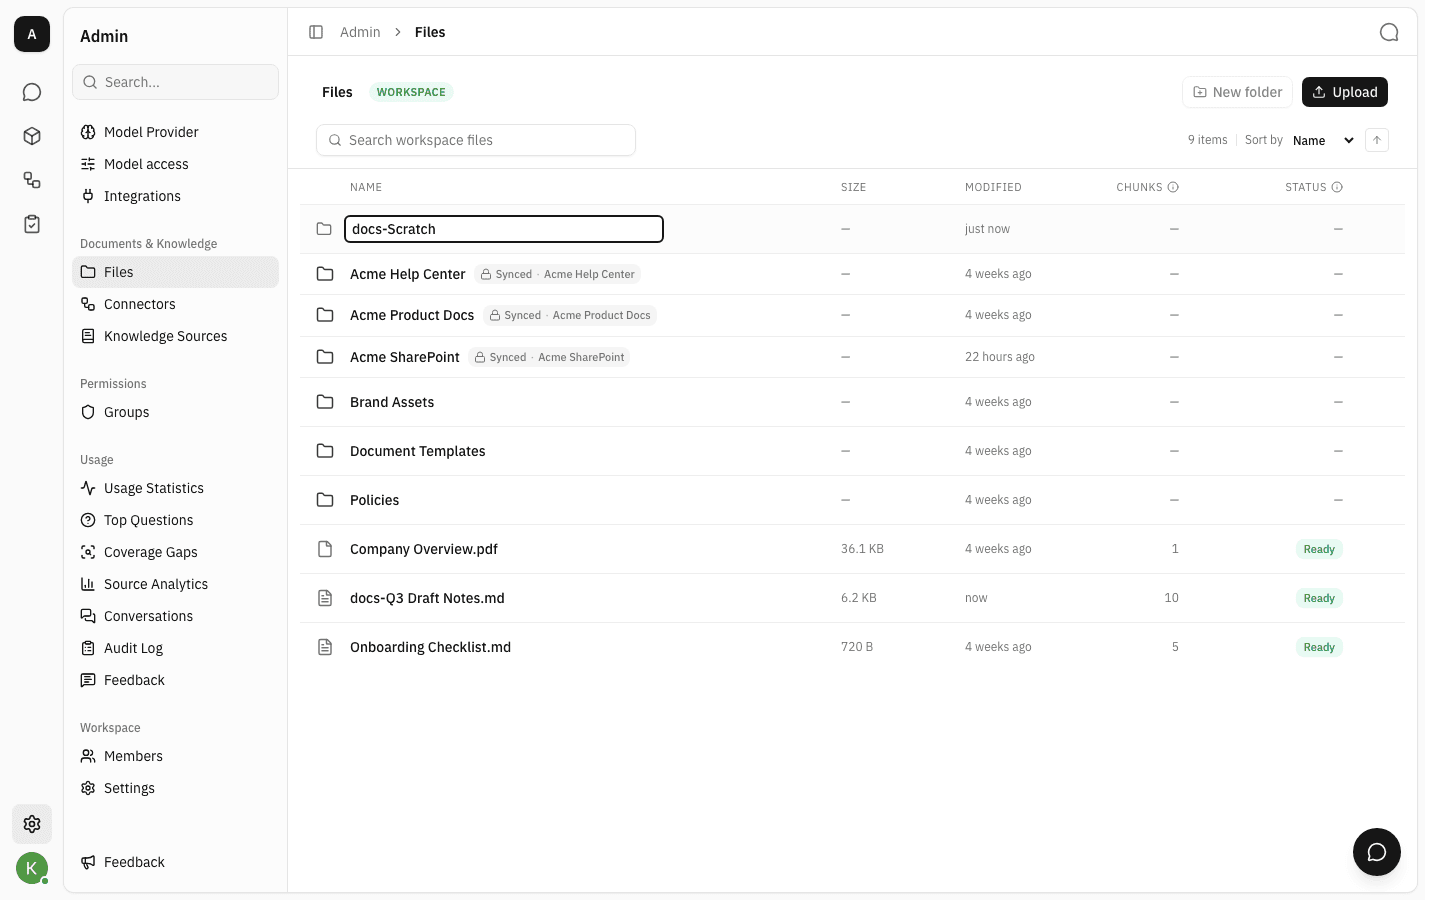
Folders always sort above files, so the shape of the library stays visible no matter how much you add.
Move a file into a folder
-
Open the file's … menu and choose Move to…. The dialog opens at the top of the library; click a folder to look inside it, and use the breadcrumb to come back out. When the destination you want is open, click Move here.
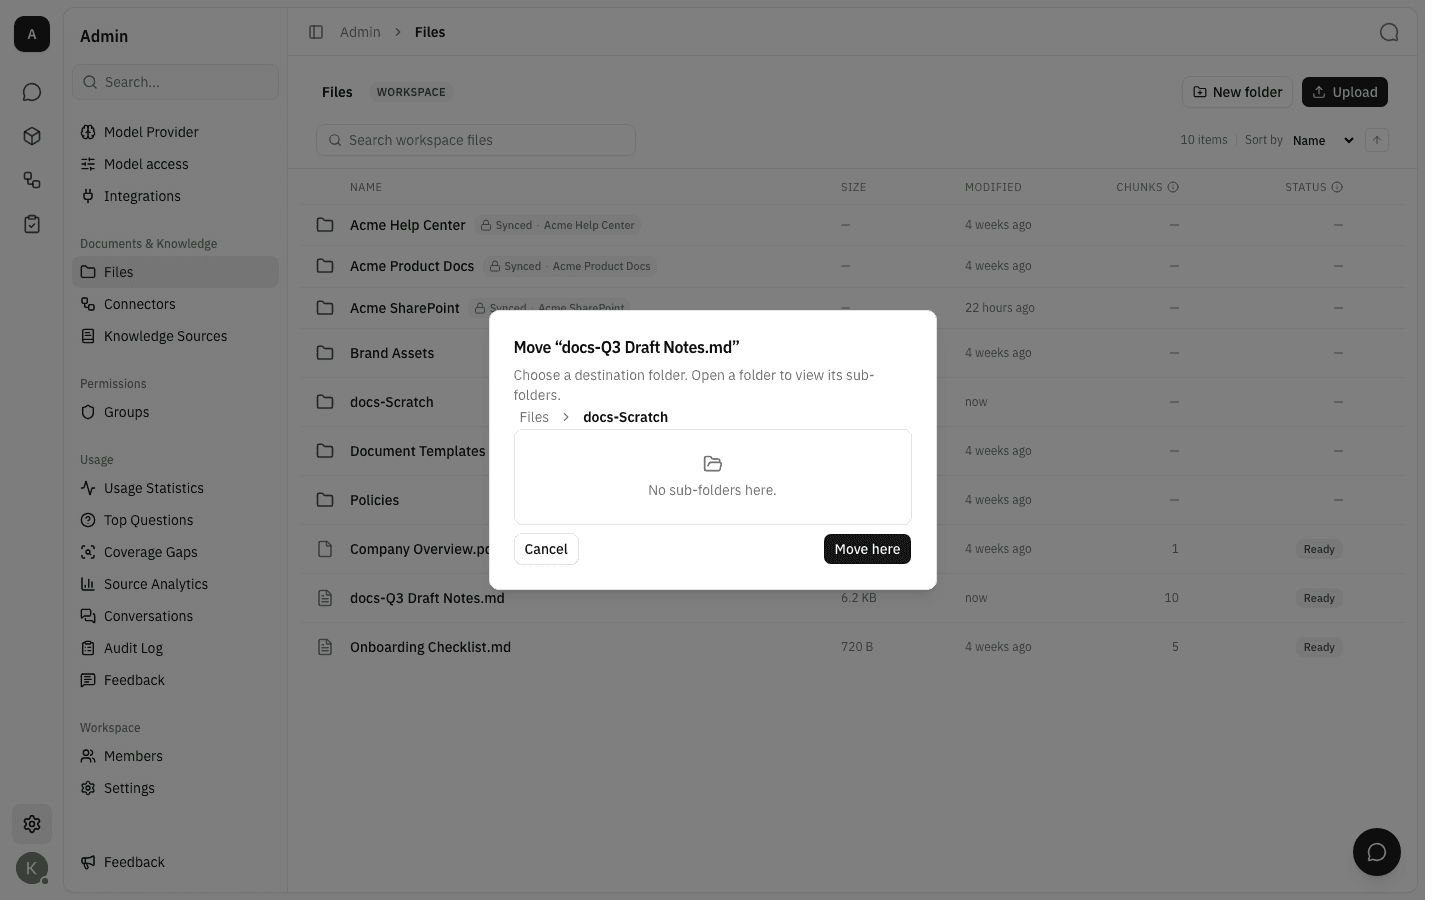
The button reads Already here while you are looking at the folder the file is currently in, which is how you can tell the move would do nothing.
-
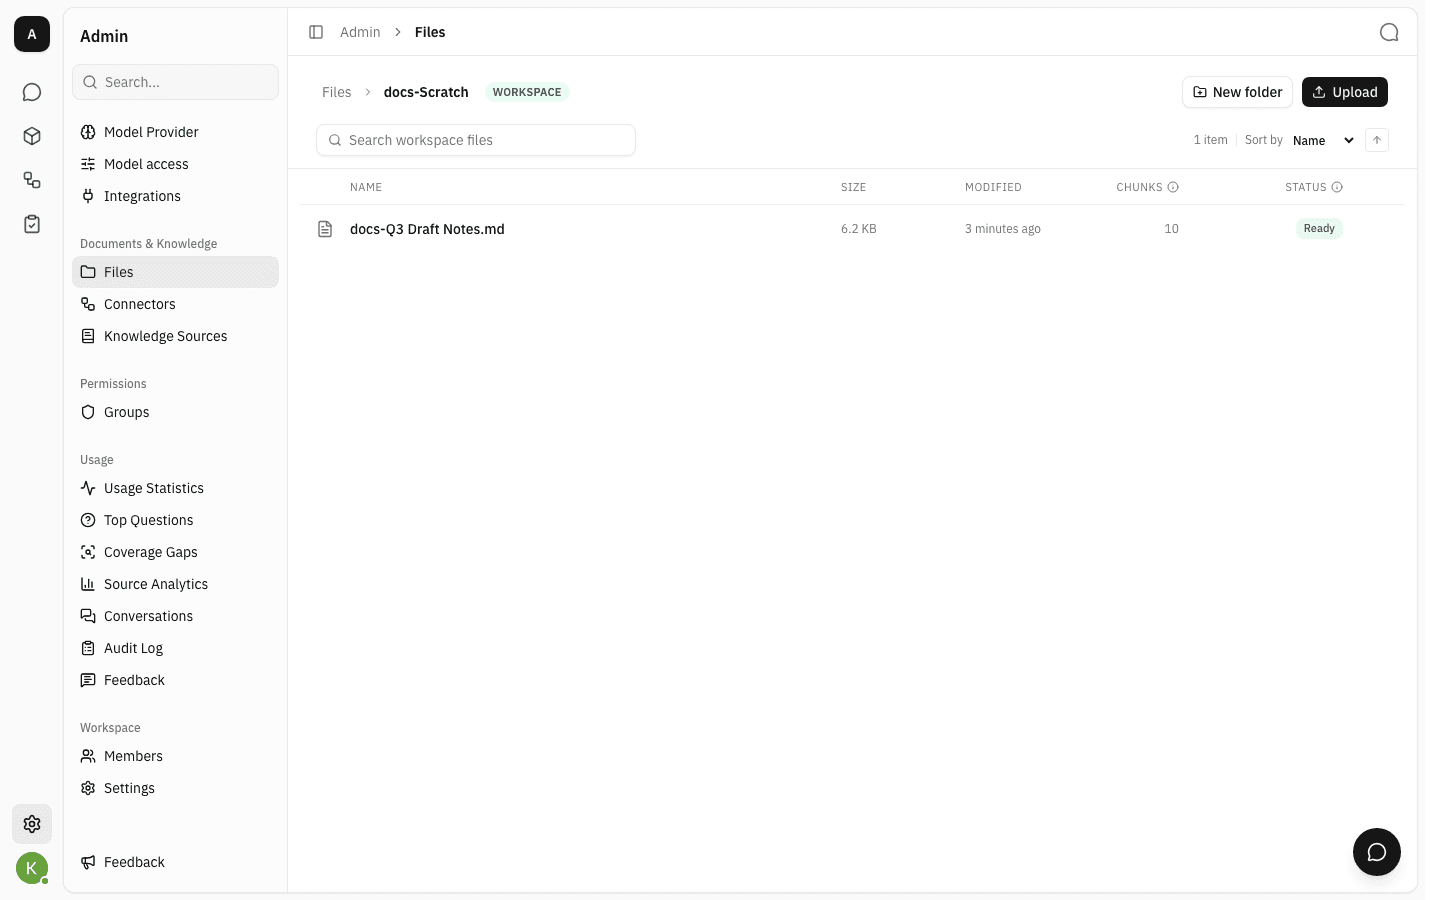
The file is now in that folder, and its indexing is untouched — the chunk count and Ready status carry over.
Open a folder
-
Double-click a folder to open it. The breadcrumb shows where you are, and clicking an earlier crumb takes you back up.
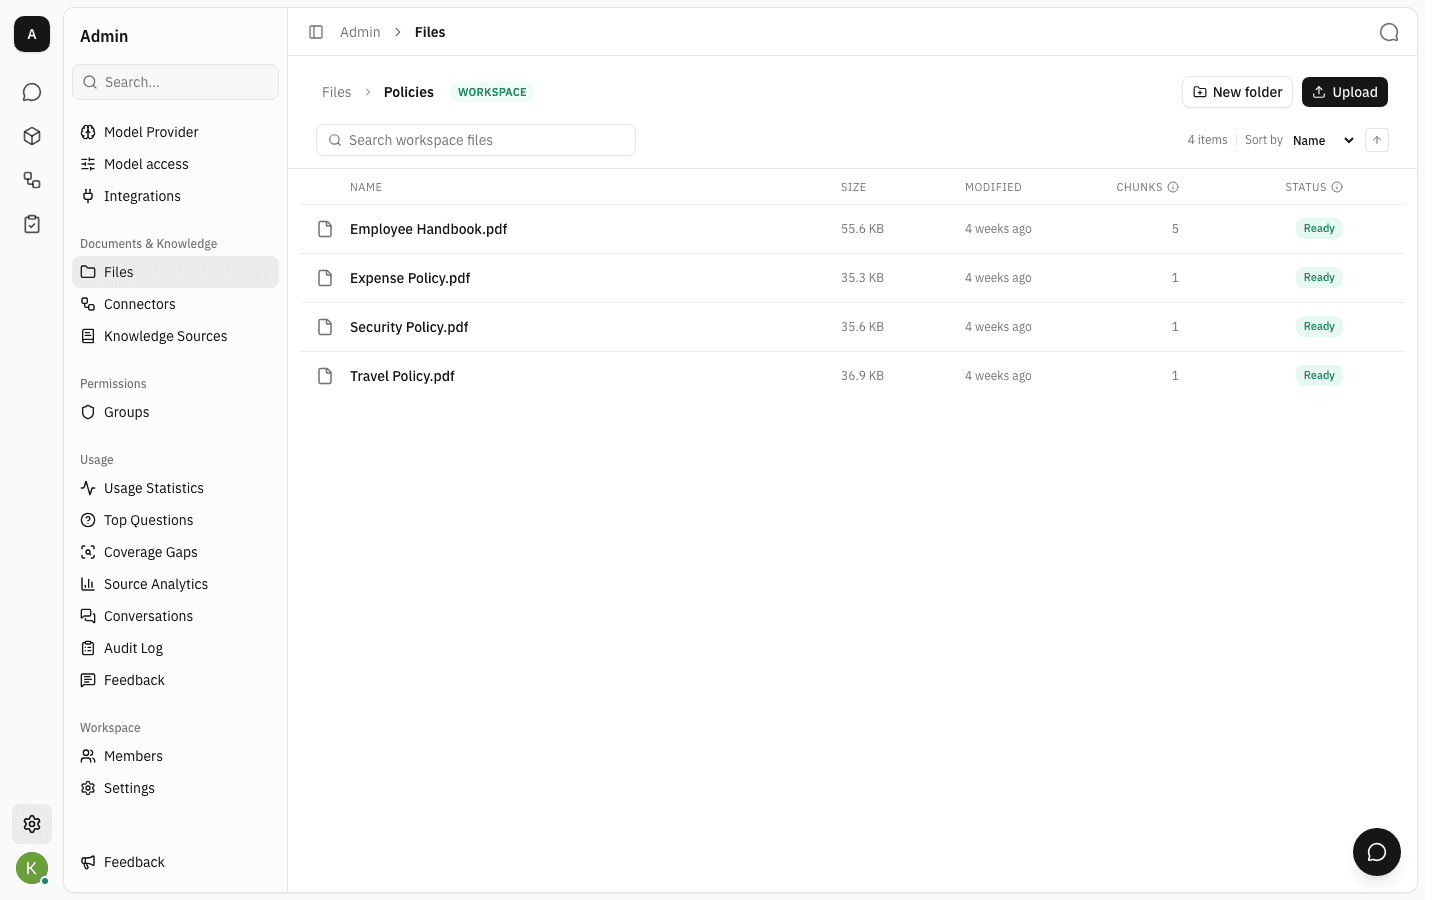
Uploading while a folder is open puts the new files in that folder.
Files that cannot be indexed
-
Documents the platform cannot read — images, spreadsheets, and other unsupported types — are stored and downloadable as normal, but marked Unsupported with no chunk count.
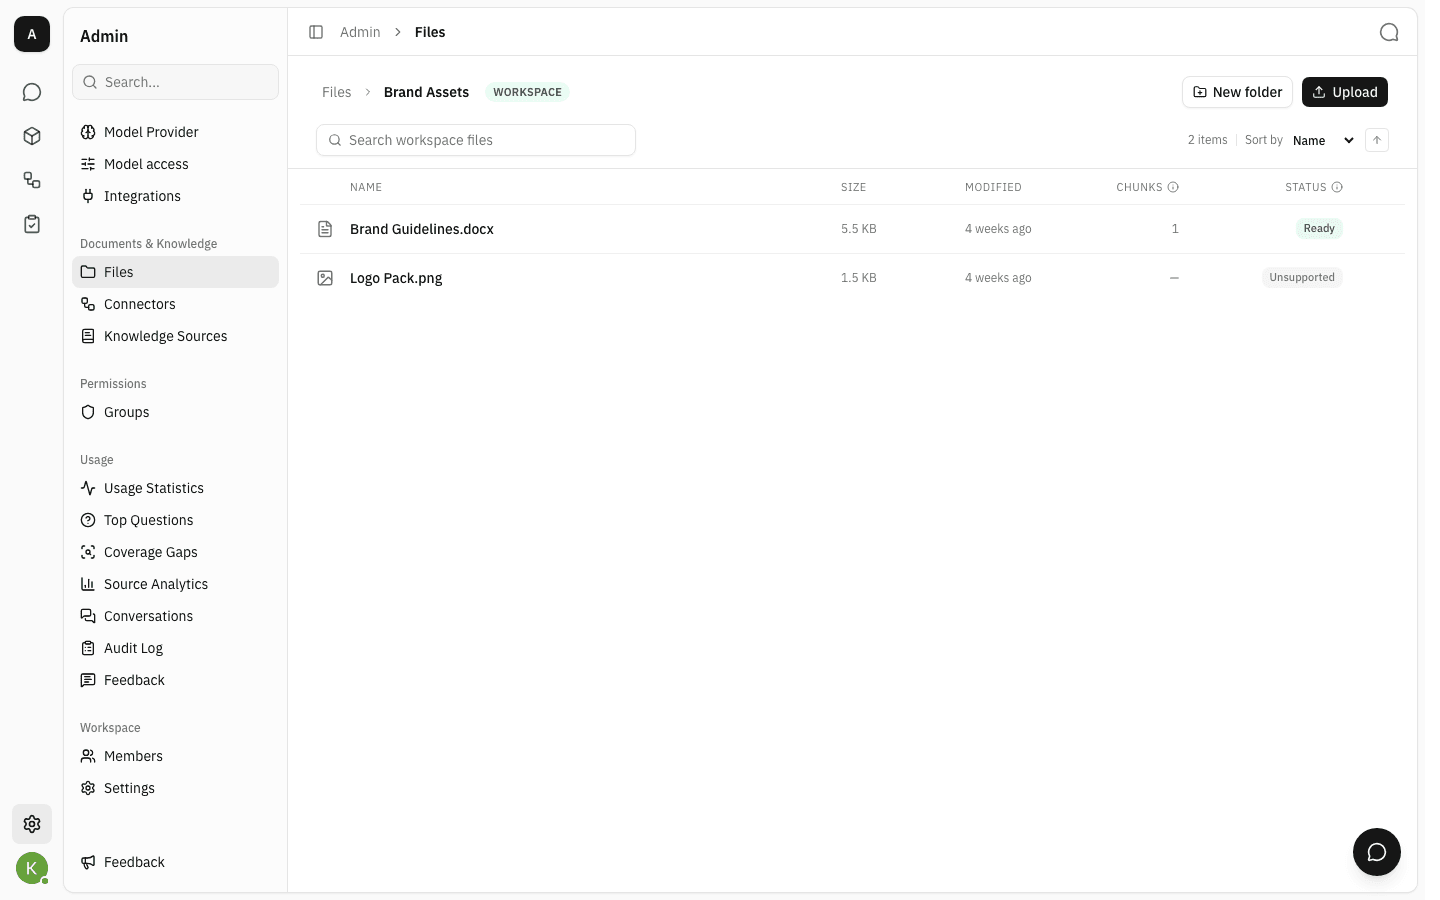
The assistant cannot quote from these, so keep anything you want it to answer from in a readable format.
Rename a folder
-
Open a folder's … menu and choose Rename. Edit the name in place and press Enter.
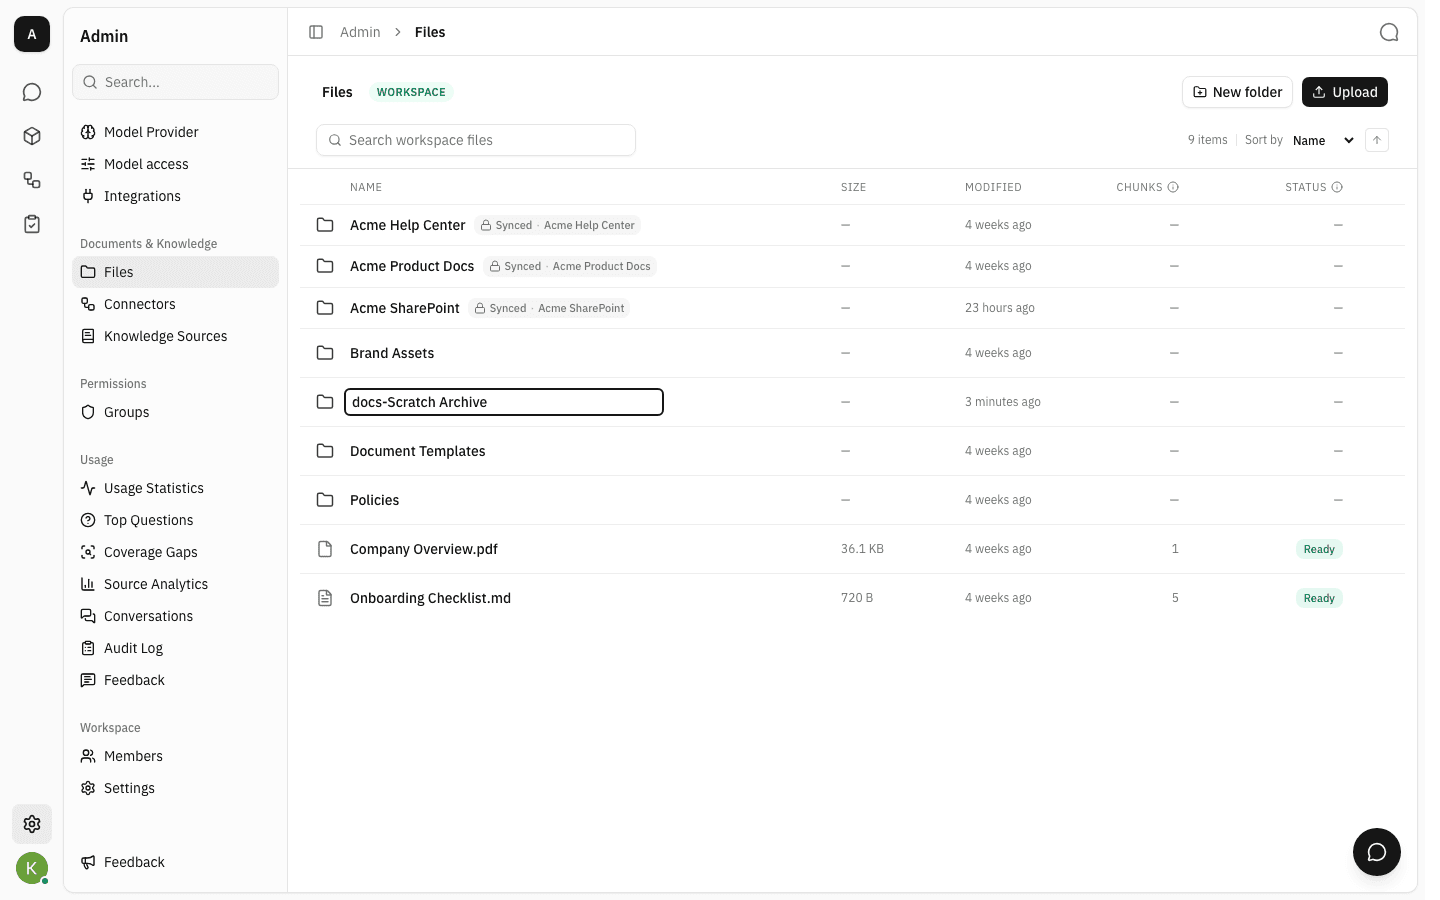
Renaming a folder does not affect the documents inside it, and nothing needs to be re-indexed.
Find a file
-
Type in the search box to narrow the list. Search matches names in the folder you are currently looking at, so open a folder first when you know roughly where something lives.
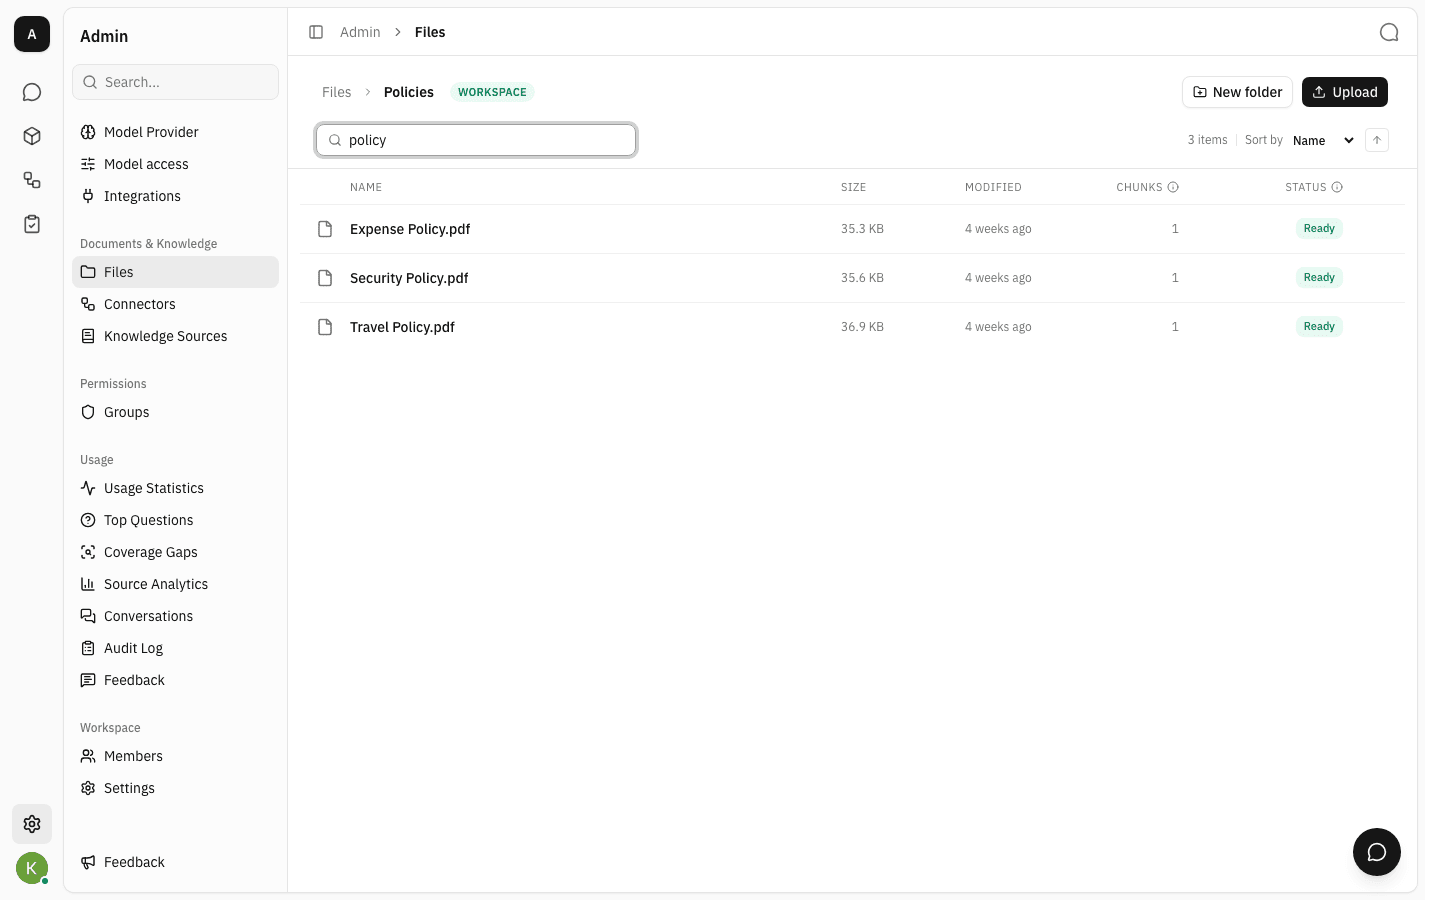
The item count next to Sort by always reflects what is on screen. You can also sort by name, modified date or size, and flip the direction with the arrow button.
Download or preview a file
- Double-click a file, or choose Download from its … menu. Images open in a preview window; every other file type downloads.
Check who can see a file
-
Owners and admins can pick Who has access from a file's … menu to see who the file is visible to.
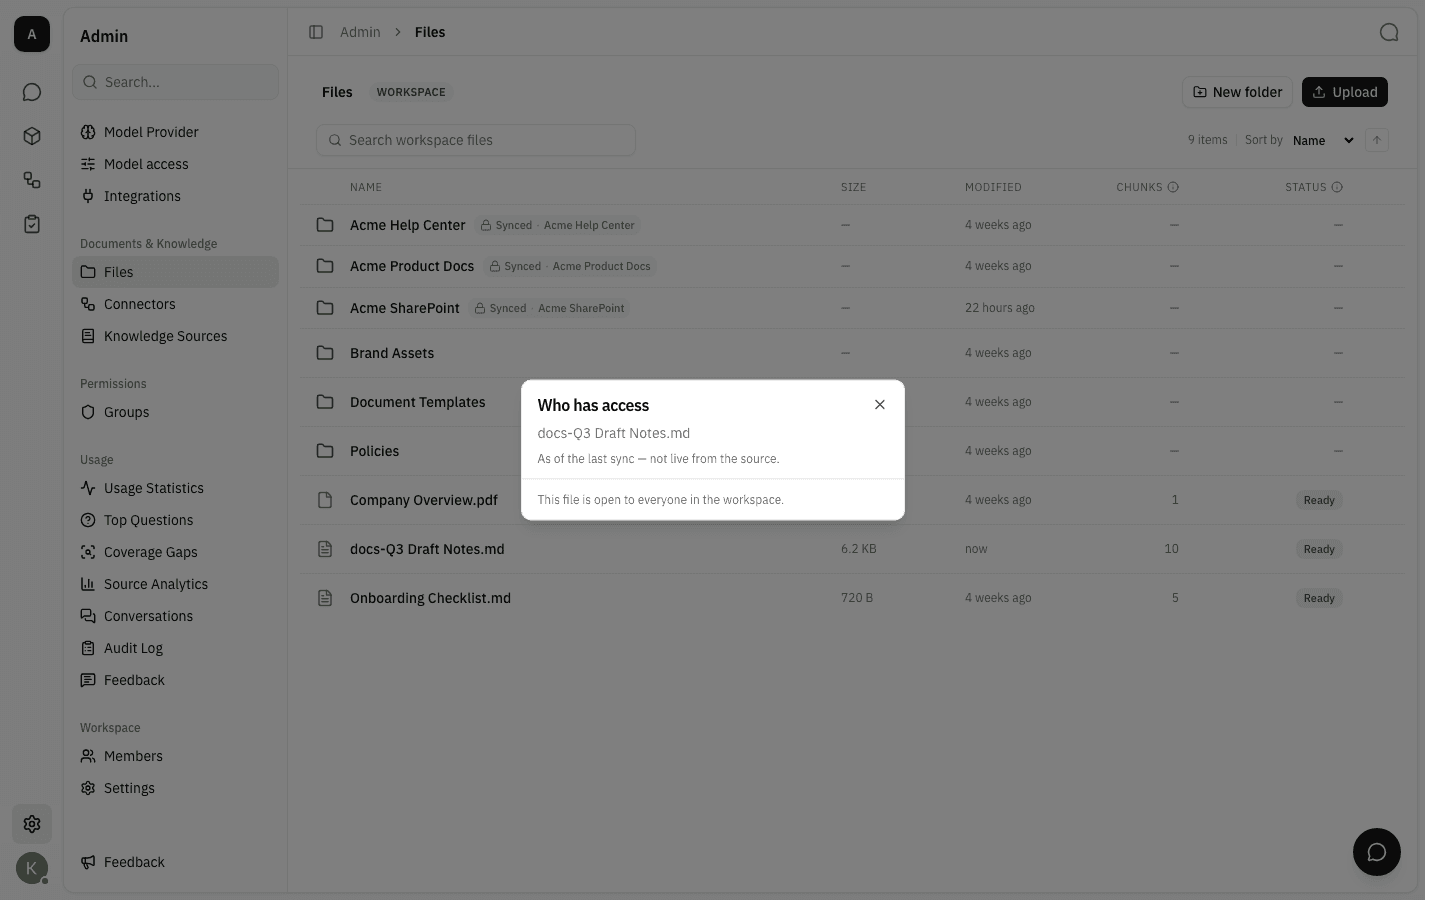
A file you upload here is open to everyone in the workspace — that is what a shared library means, and there is no per-file switch to change it. Files brought in by a knowledge source are the exception: they arrive carrying whatever permissions their source gave them, so the panel may instead list a specific set of people, and it reports what was true as of the last sync rather than reading the source live.
Files brought in by a knowledge source
-
Folders and files created by a knowledge source carry a Synced badge and a padlock, with the source's name beside it. Click the badge to see where the item came from.
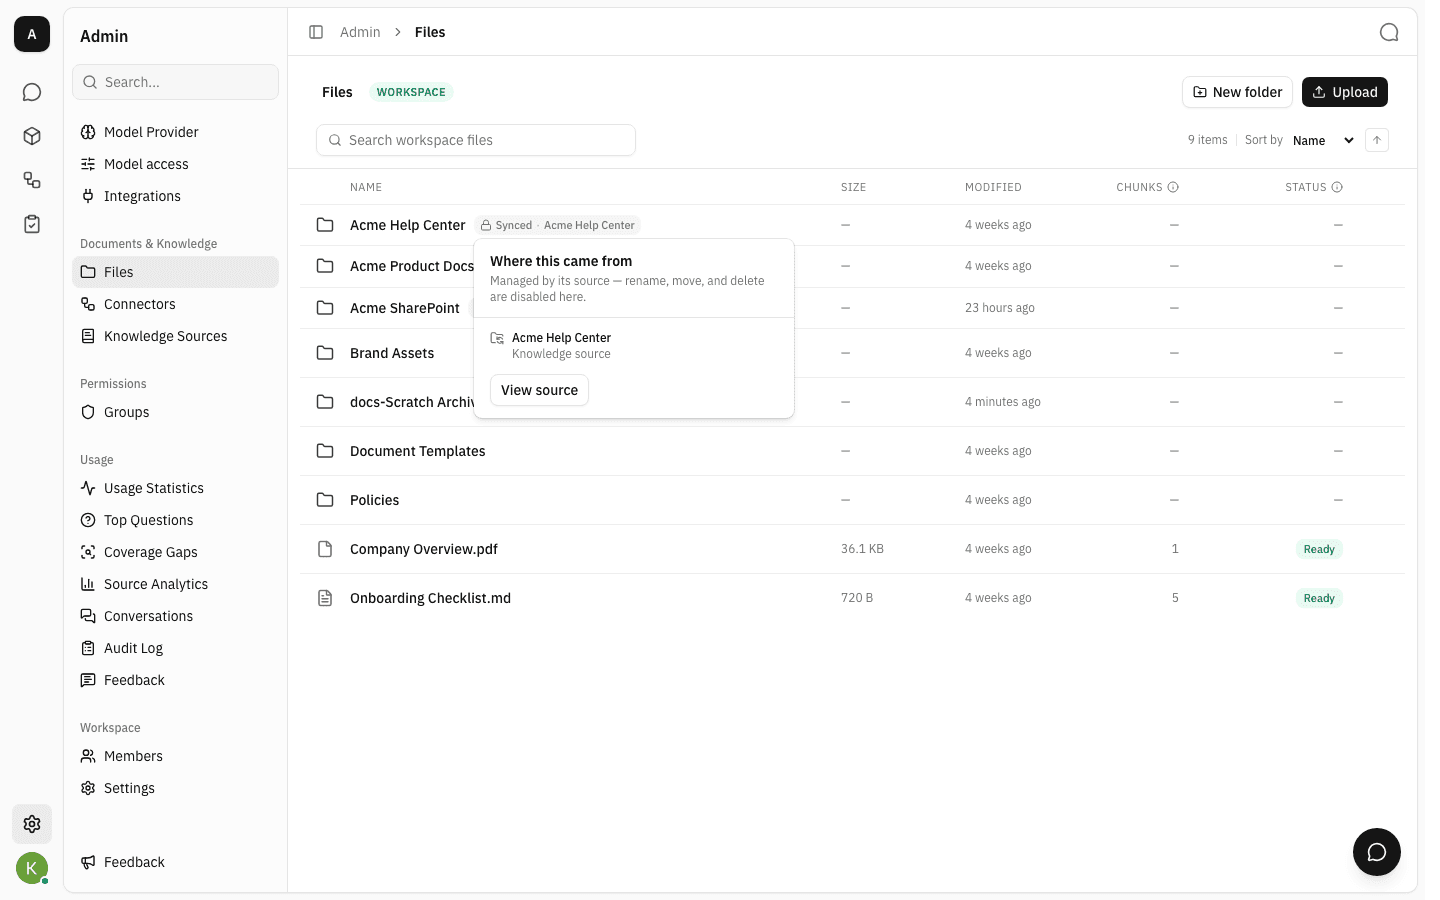
They have no … menu at all: the source that created them decides their contents, so they cannot be renamed, moved or deleted here. View source takes you to the knowledge source that owns them, which is where you change what gets synced.
Delete a file or folder
-
Choose Delete from the … menu of the item you want to remove, then confirm.
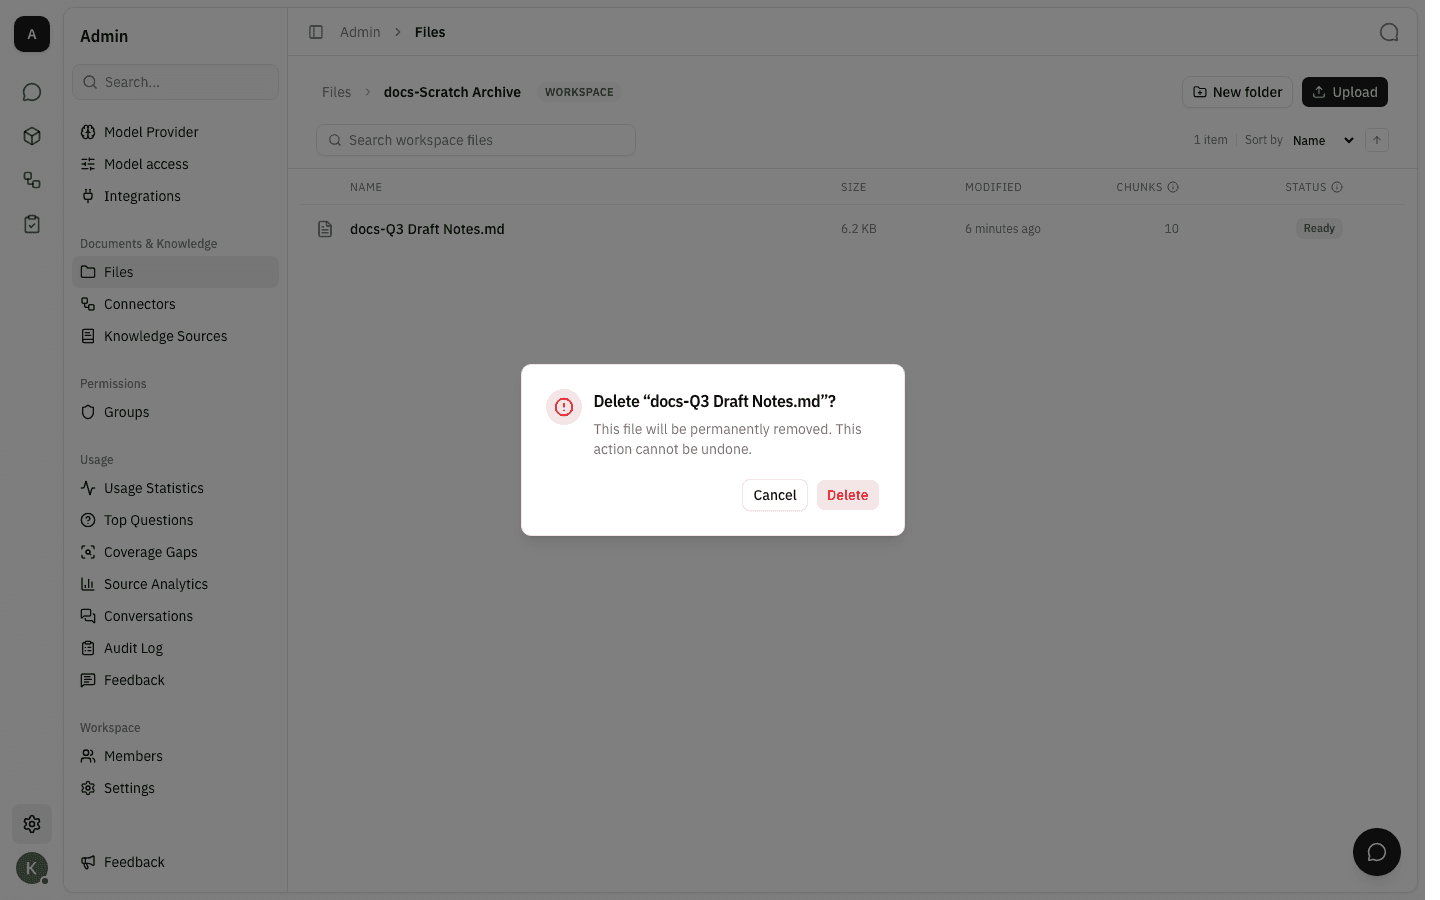
Deleting is permanent — there is no recycle bin. Deleting a folder also permanently removes everything inside it, and the dialog says so, but it does not list the contents — so check them first. Deleting a document also removes it from the assistant's search index.
Notes
- Upload limits: up to 20 files per upload, and 100 MB per file. Executables, scripts, HTML, audio and video are rejected outright; anything skipped is named in a warning so you know what did not make it.
- What can be indexed: PDF, Word (
.docx), PowerPoint (.pptx), plain text and Markdown. Other formats are still stored and downloadable — they are simply not searchable by the assistant. - Keeping material out of the shared library: everything on this page is readable by the whole workspace, so it is the wrong home for anything confidential. Groups control who can change these files, not who can read them. If a document should only be readable by a named few, put it in a project and add just those people — or, when the document already lives in a system with its own permissions, bring it in through a knowledge source, which carries those permissions across.