Project files
Upload and organize the documents that belong to one project, visible only to that project's people, and ask the assistant about them.
Files is a project's own document library. Everything you put here belongs to that project and is reachable only by the people who have access to it — its members, the groups granted access, and workspace owners and admins.
It is the counterpart to Workspace files, which everyone in the workspace can see. The browser looks the same in both places; what differs is who can reach the documents and what each person is allowed to do with them. If a document should only be seen by a few people, it belongs in a project.
Prerequisites
- Access to the project — as a member, through a group, or as a workspace owner or admin.
- What you can do on this page depends on the permissions you hold in the
project:
- Viewing the list needs
file:list. Every project member has it; without it the page shows an access-denied message instead. - Uploading needs
file:upload, downloading and previewing needsfile:read, moving a file needsfile:update, and deleting needsfile:delete. - Folders have their own set:
folder:create,folder:update(rename and move) andfolder:delete. - Project owners hold all of these. Plain project members start with view-only access — they can see the list, but the Upload, New folder and row actions are simply not shown until the extra permissions are granted to them through the project's Groups page.
- Viewing the list needs
- To make uploaded documents searchable, the workspace needs a working model provider. Without one, files still upload and store, but indexing fails.
Open a project's files
-
Open the project and choose Files in its sidebar. A new project starts empty, offering the only two things you can do from here.
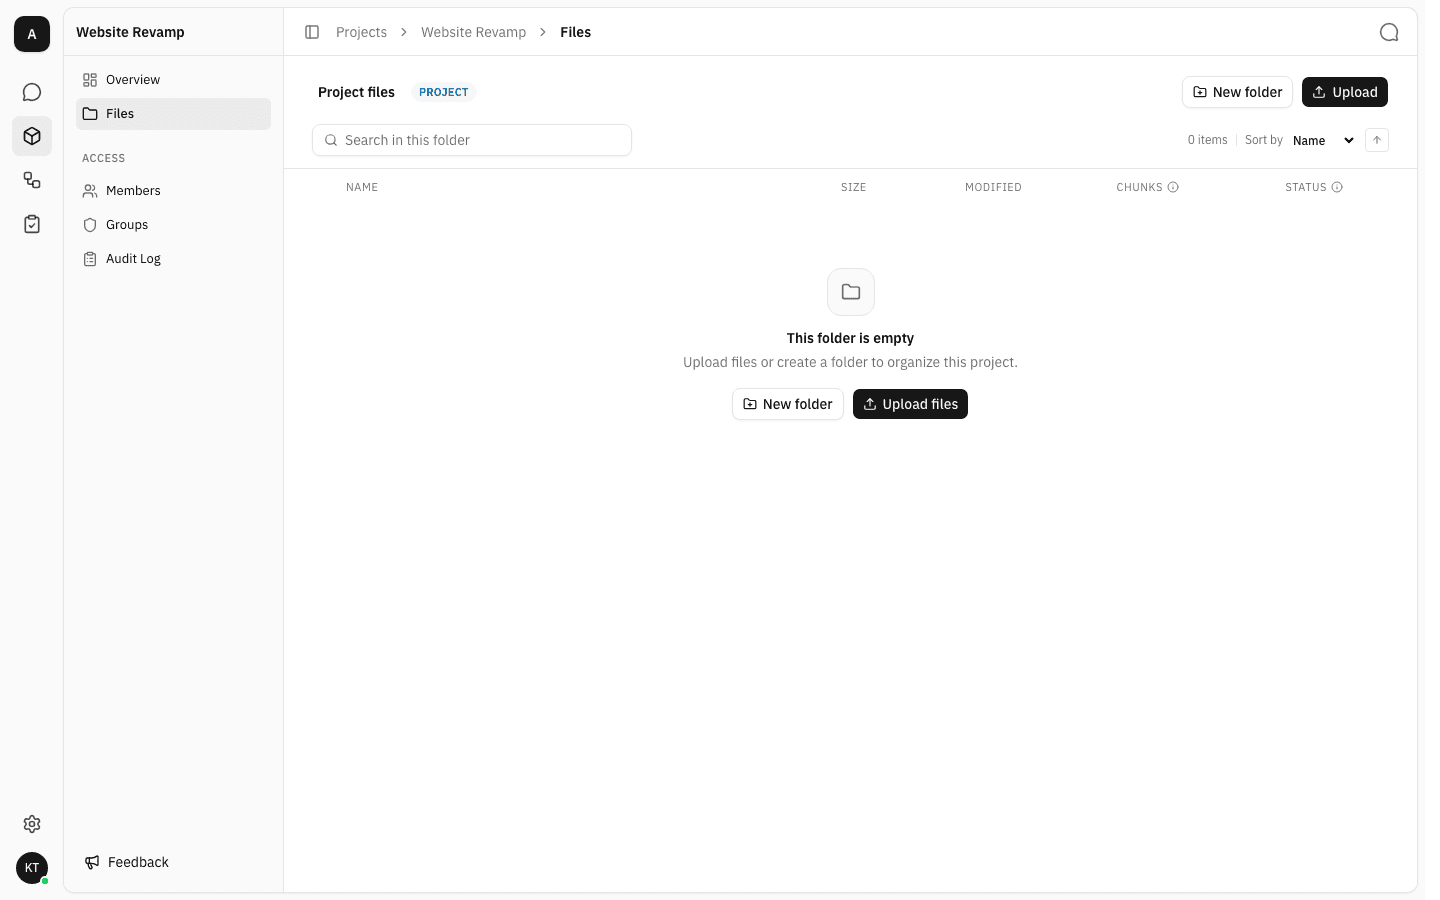
The blue Project badge next to the breadcrumb tells you which library you are looking at. The same browser appears under Admin → Files for the whole workspace, where the badge is green and reads Workspace — worth a glance before you upload something confidential.
Upload documents
-
Click Upload and pick one or more files, or drag them from your desktop straight onto the list. Uploading starts immediately and each document begins indexing on its own.
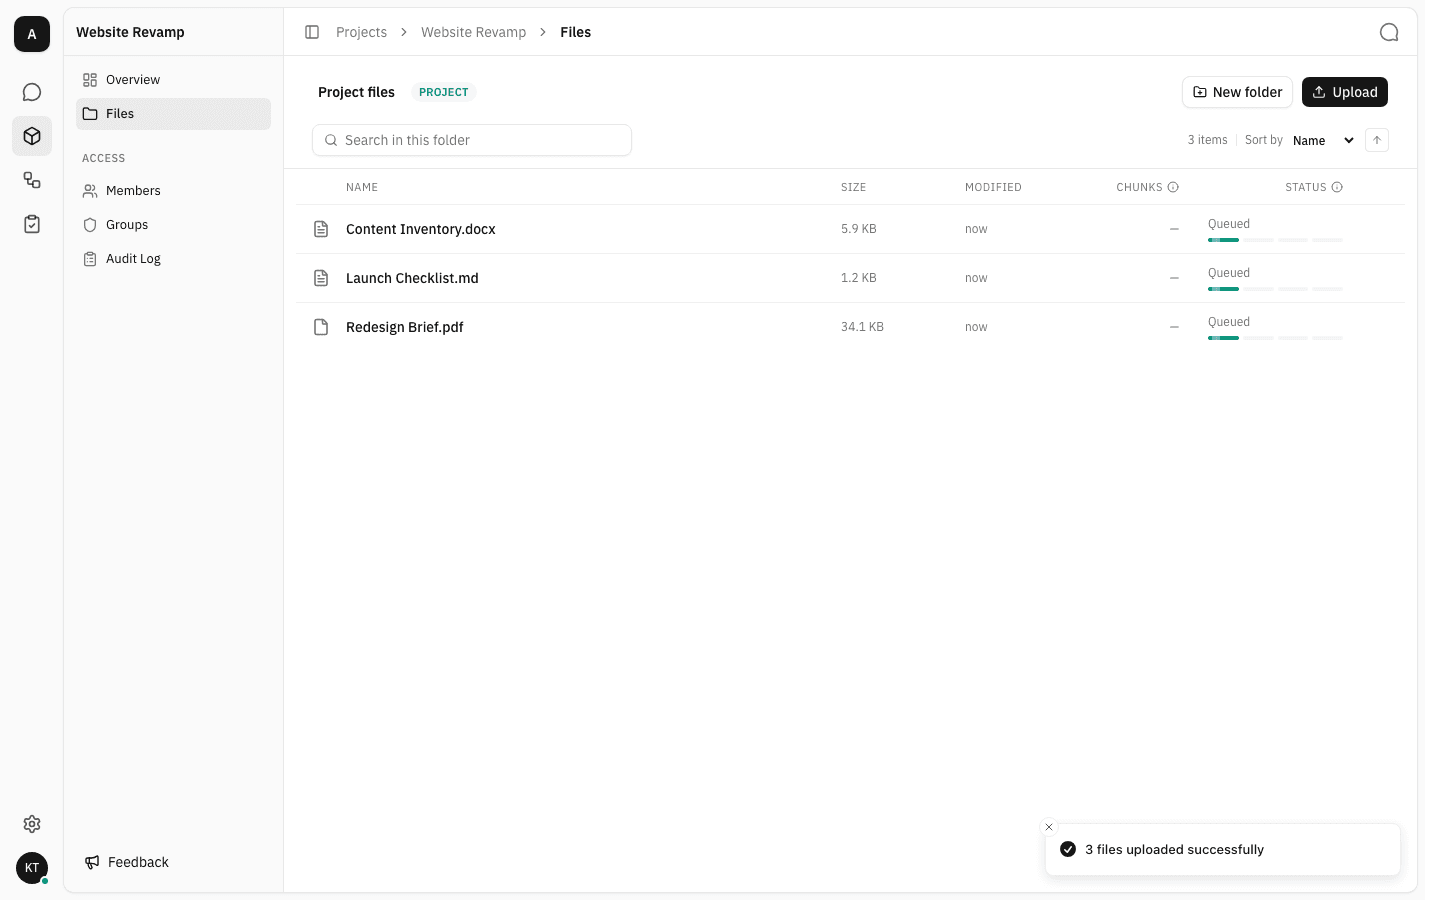
The Status column tracks indexing through Queued, Extracting, Chunking and Embedding. You can leave the page — indexing carries on.
-
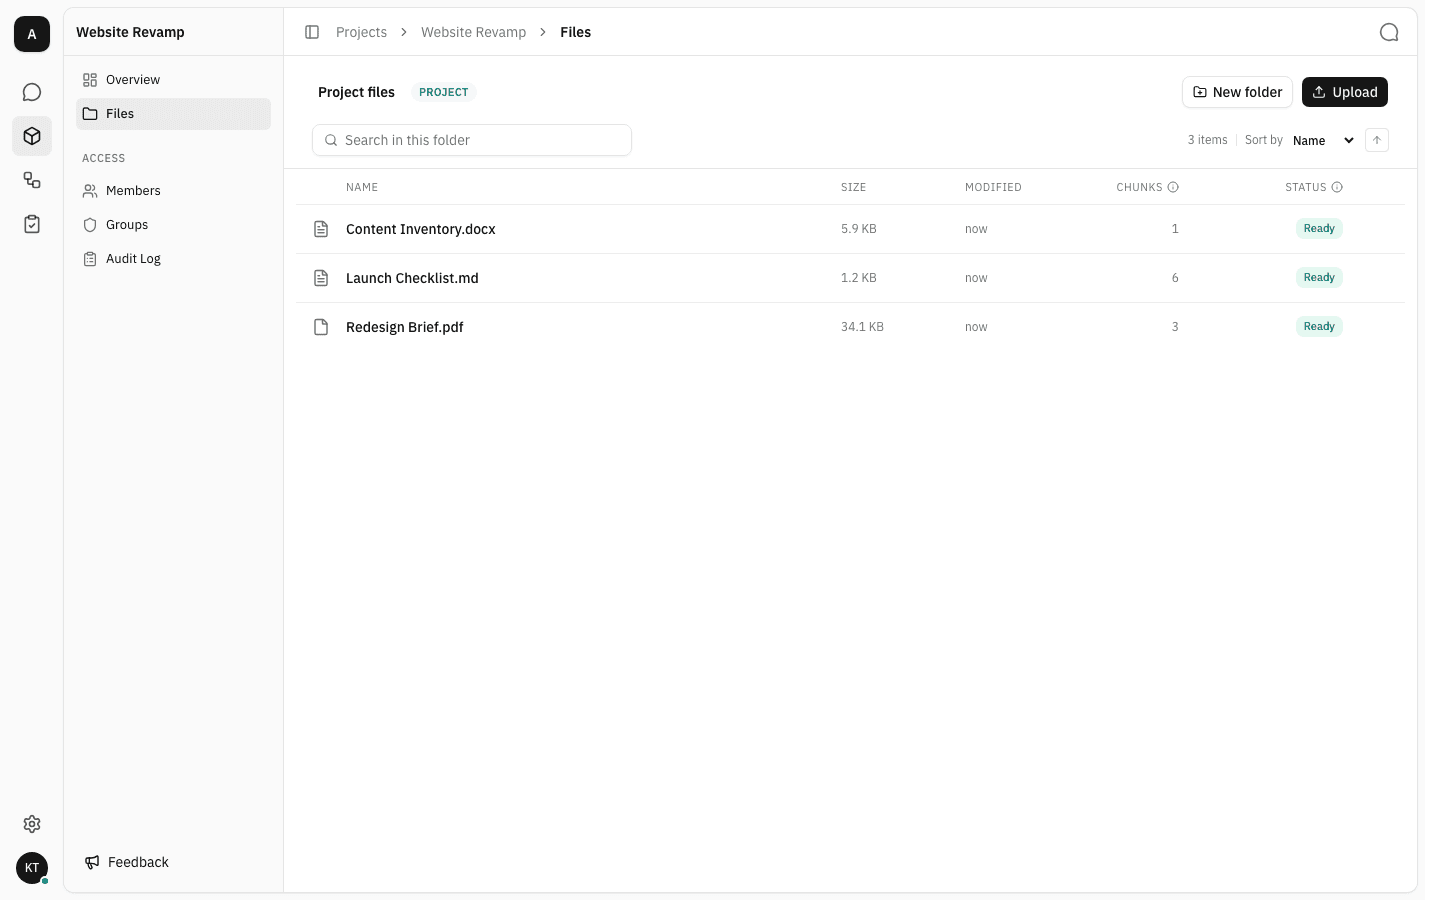
When a document is indexed its status becomes Ready, and Chunks shows how many text segments it was split into for search. Only Ready documents can be found by the assistant.
Files the platform cannot index — images, spreadsheets and other unsupported types — are stored and downloadable as normal, but marked Unsupported. A document that ends in Failed gets a Retry button next to the badge.
Organize with folders
-
Click New folder. The row appears at the top of the list with its name ready to edit — type the name and press Enter.
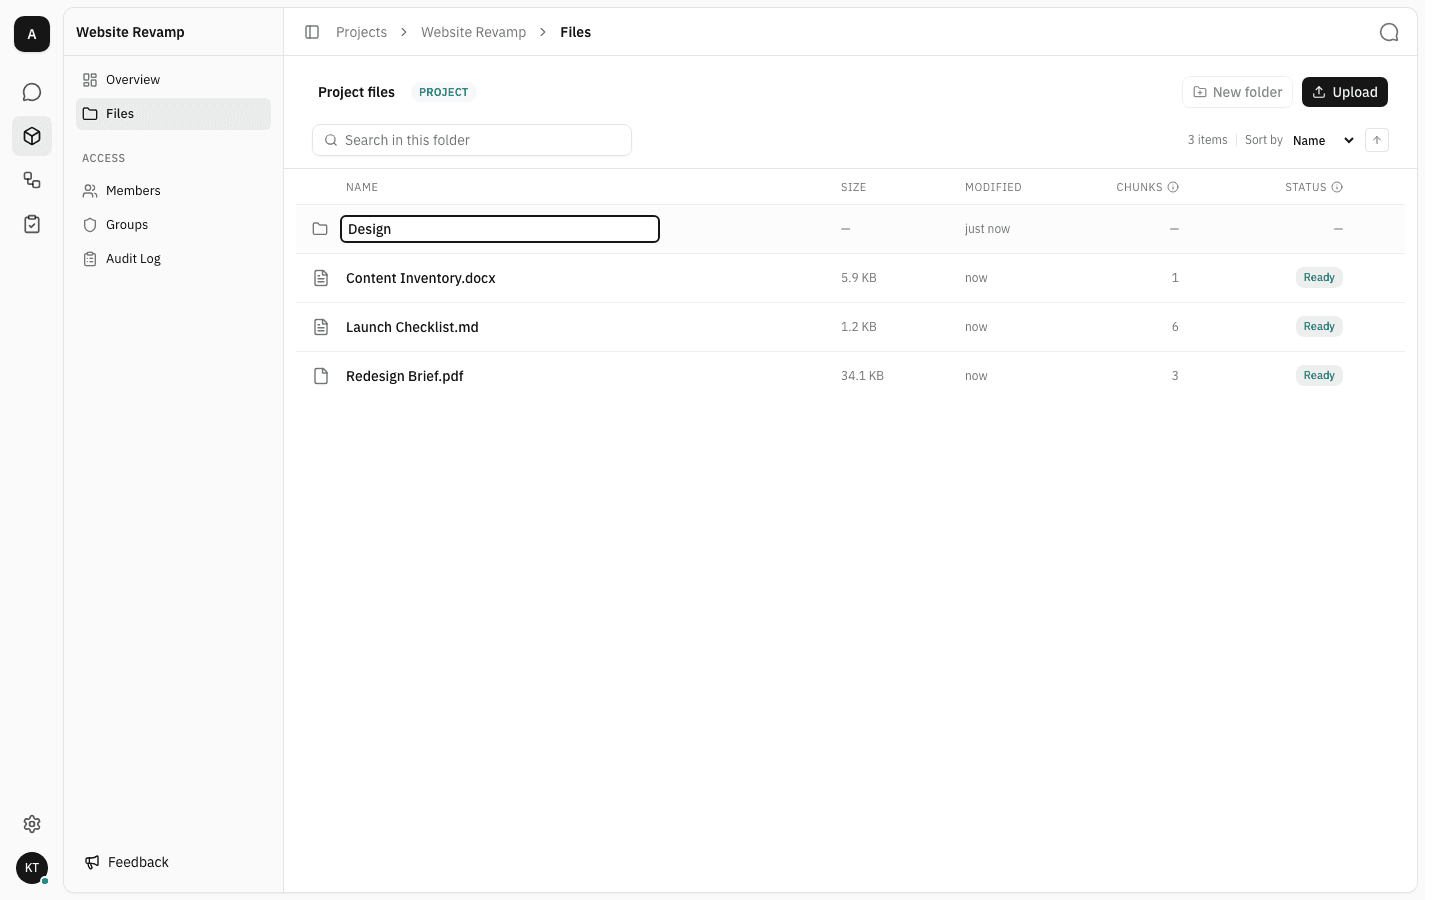
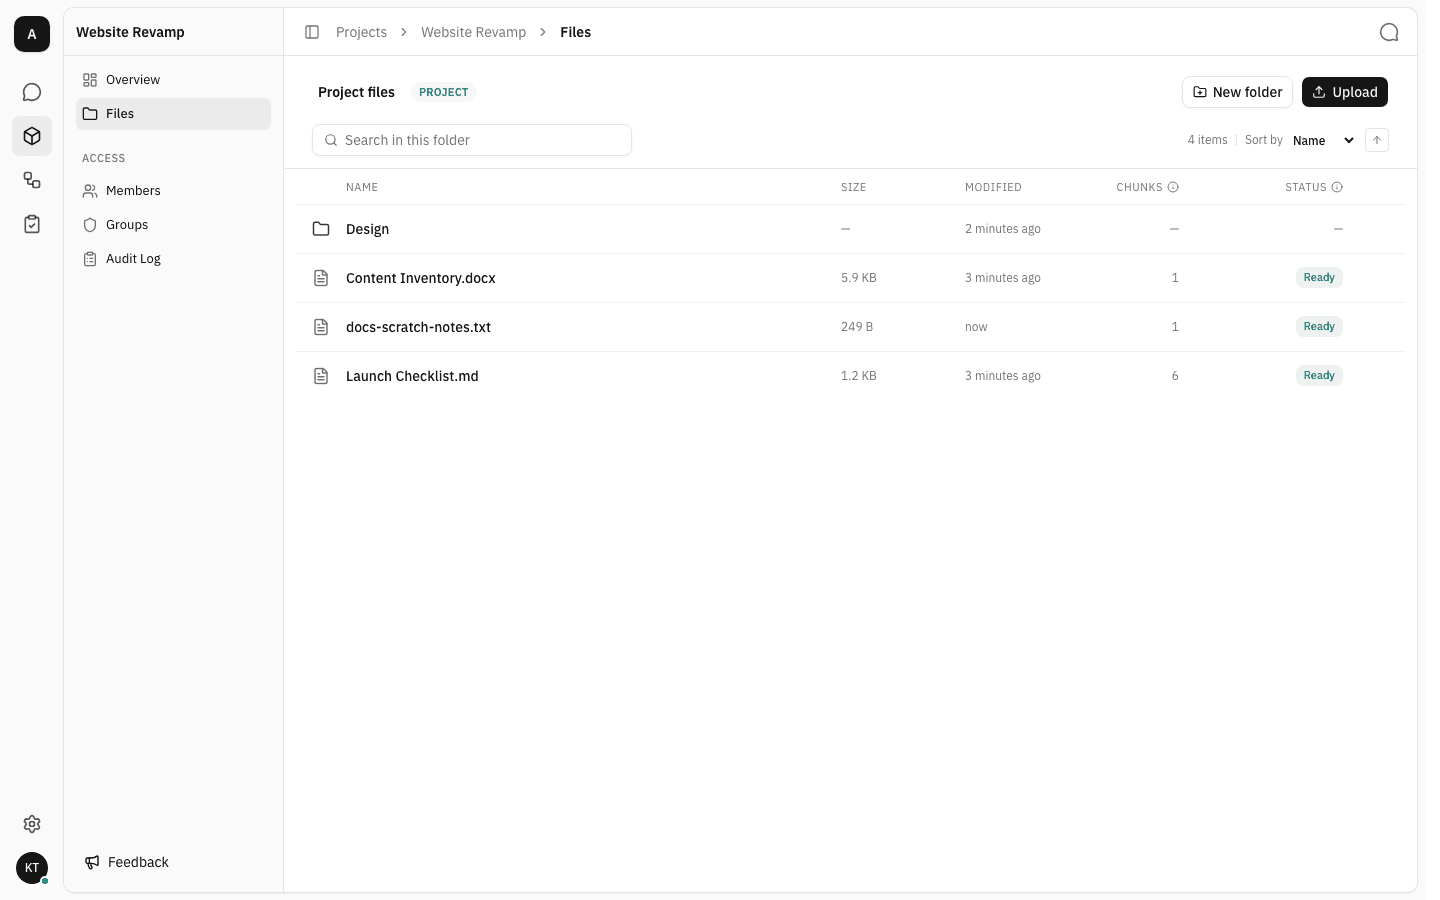
Folders always sort above files, so the shape of the project stays visible no matter how much you add.
-
To file a document away, hover its row and open the … menu at the end.
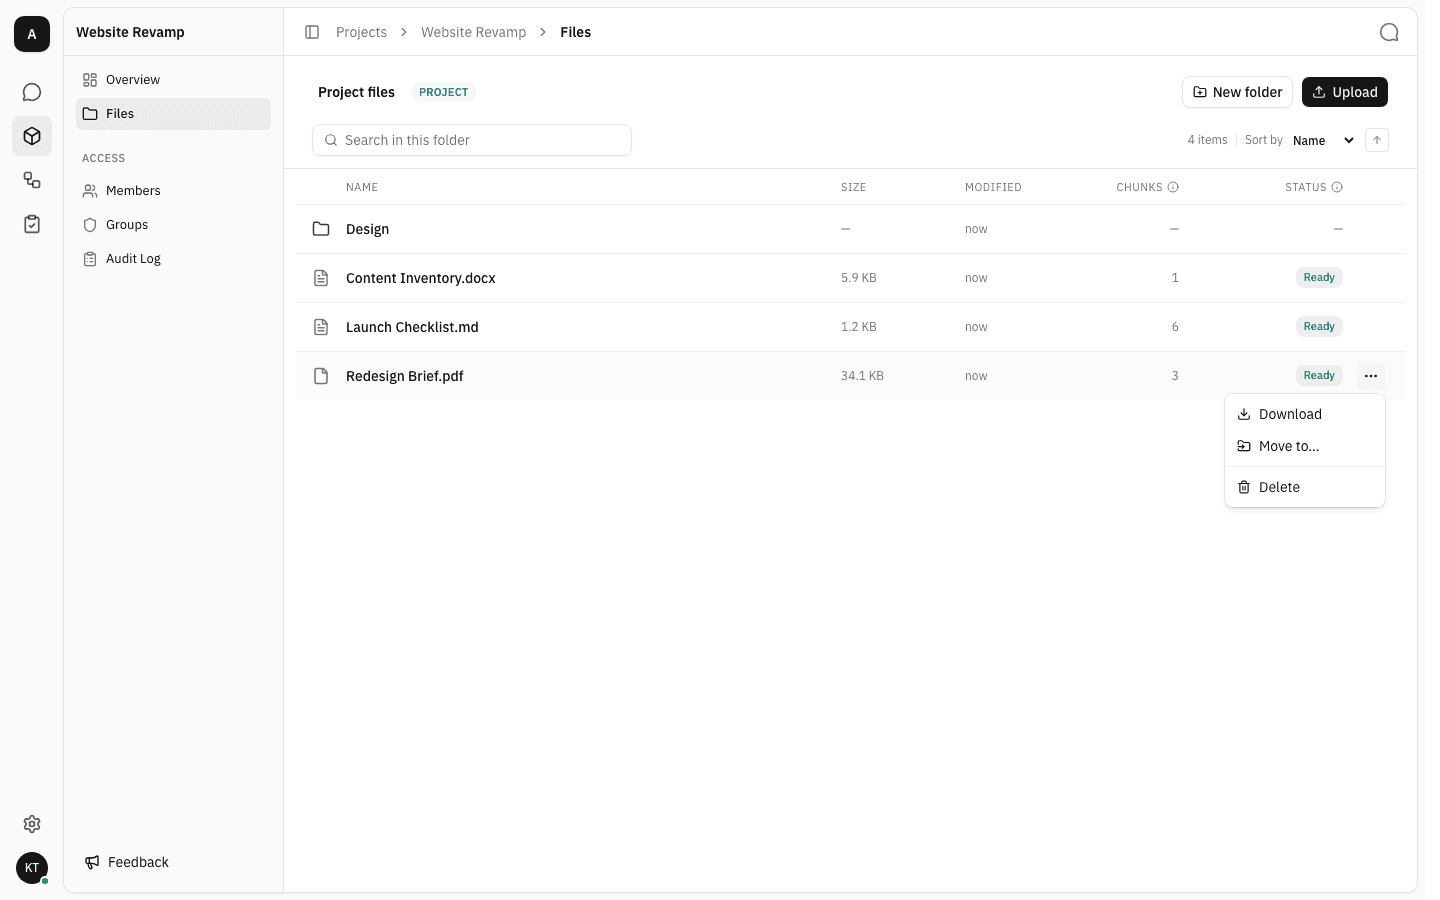
-
Choose Move to…. The dialog opens at the top of the project; click a folder to look inside it, use the breadcrumb to come back out, and click Move here when the destination you want is open.
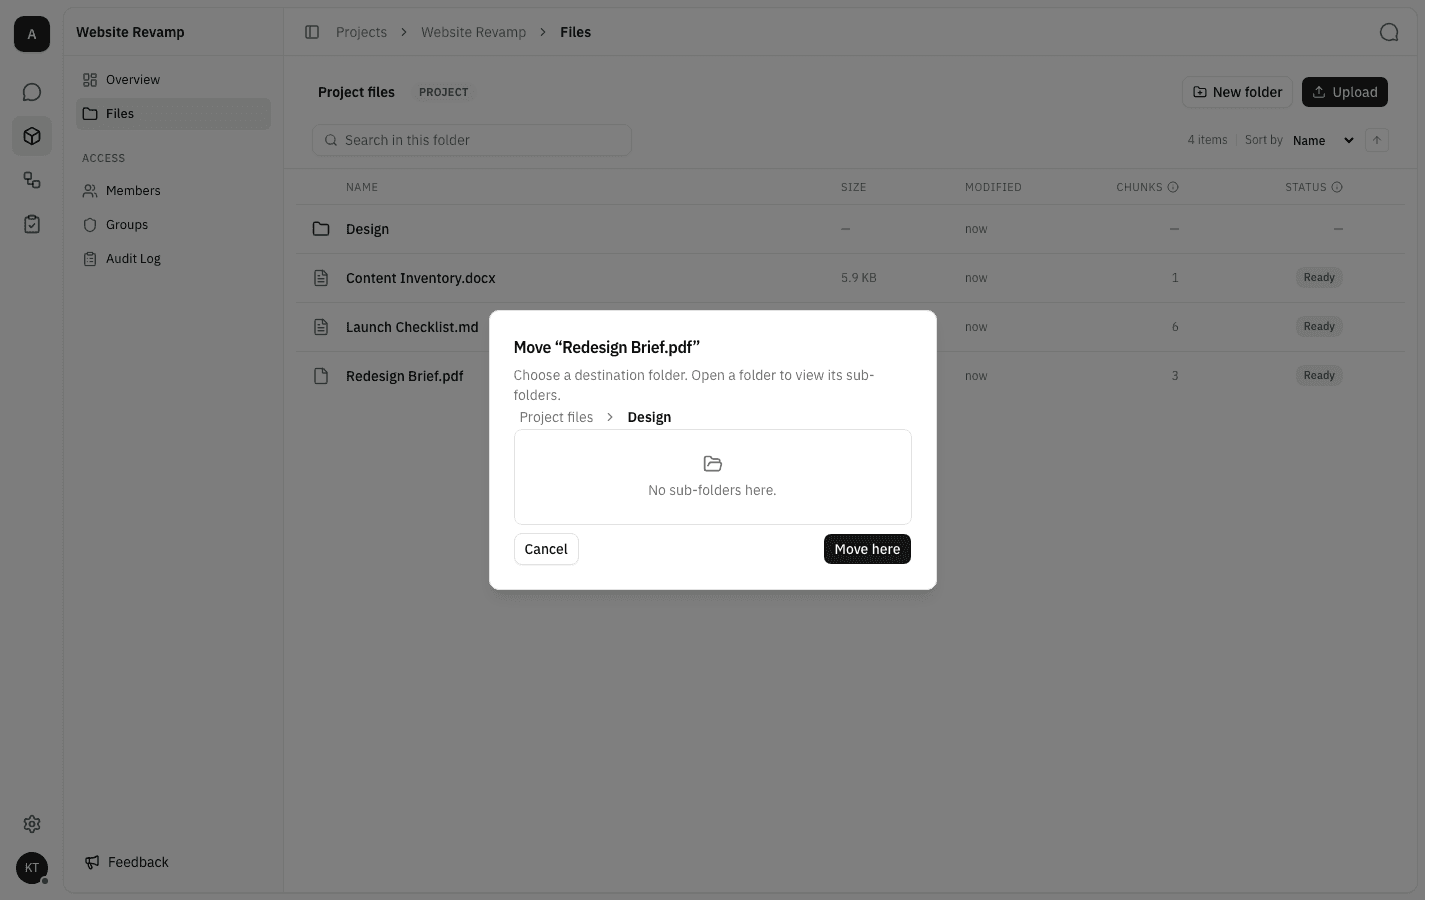
The button reads Already here while you are looking at the folder the file currently sits in, which is how you can tell the move would do nothing.
-
Double-click a folder to open it. The breadcrumb shows where you are, and clicking Project files takes you back to the top.
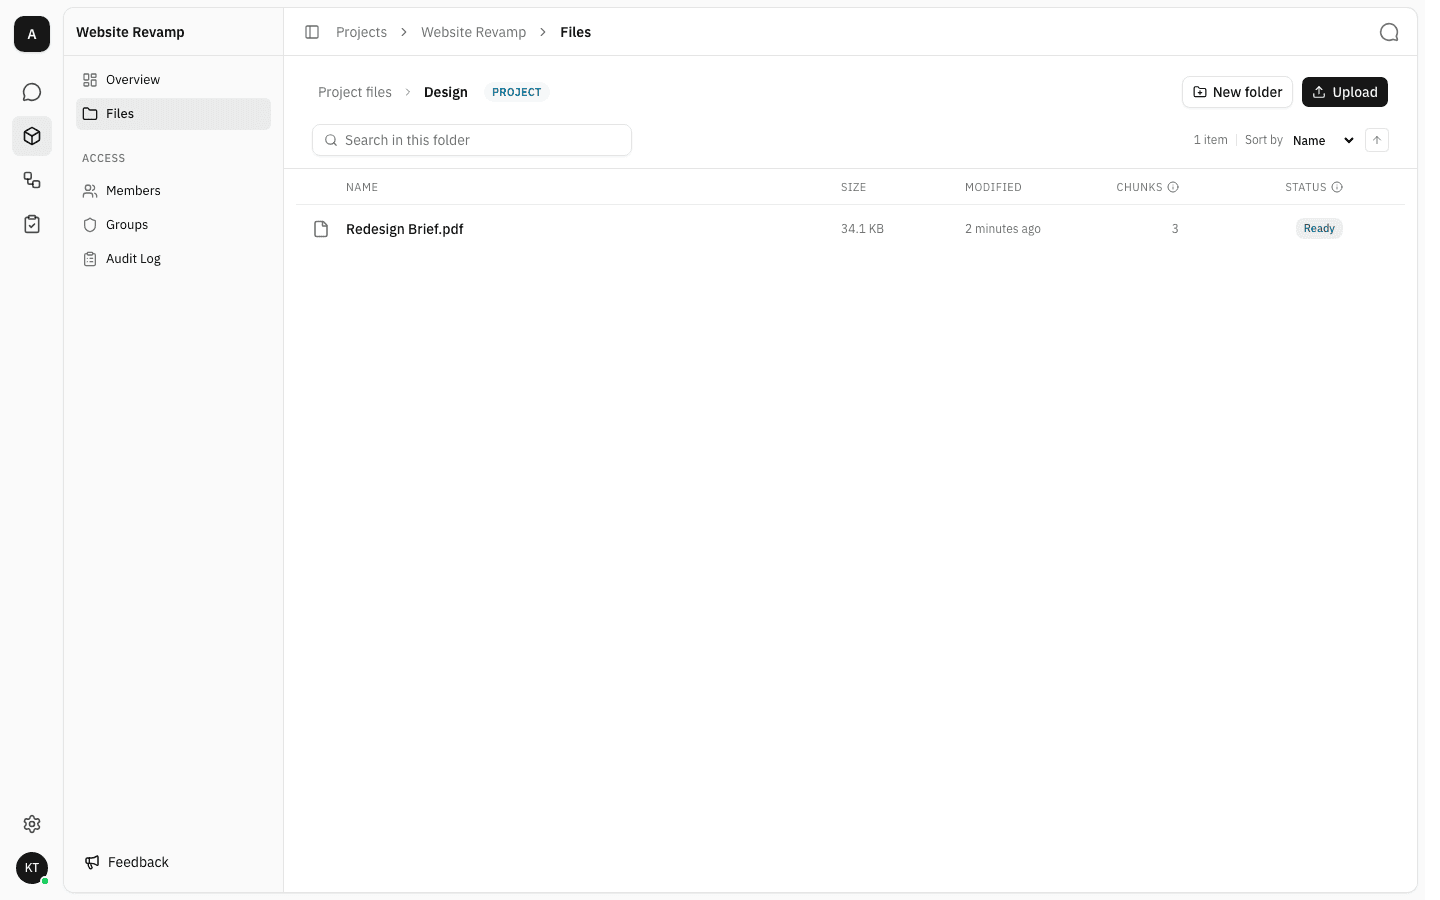
Uploading while a folder is open puts the new files in that folder. Folders can be renamed in place from their own … menu, which does not disturb the documents inside.
-
Back at the top level, the project reads as a small library rather than a pile of uploads.
Find a document
-
Type in the search box to narrow the list. Search matches names in the folder you are currently looking at, so open a folder first when you know roughly where something lives.
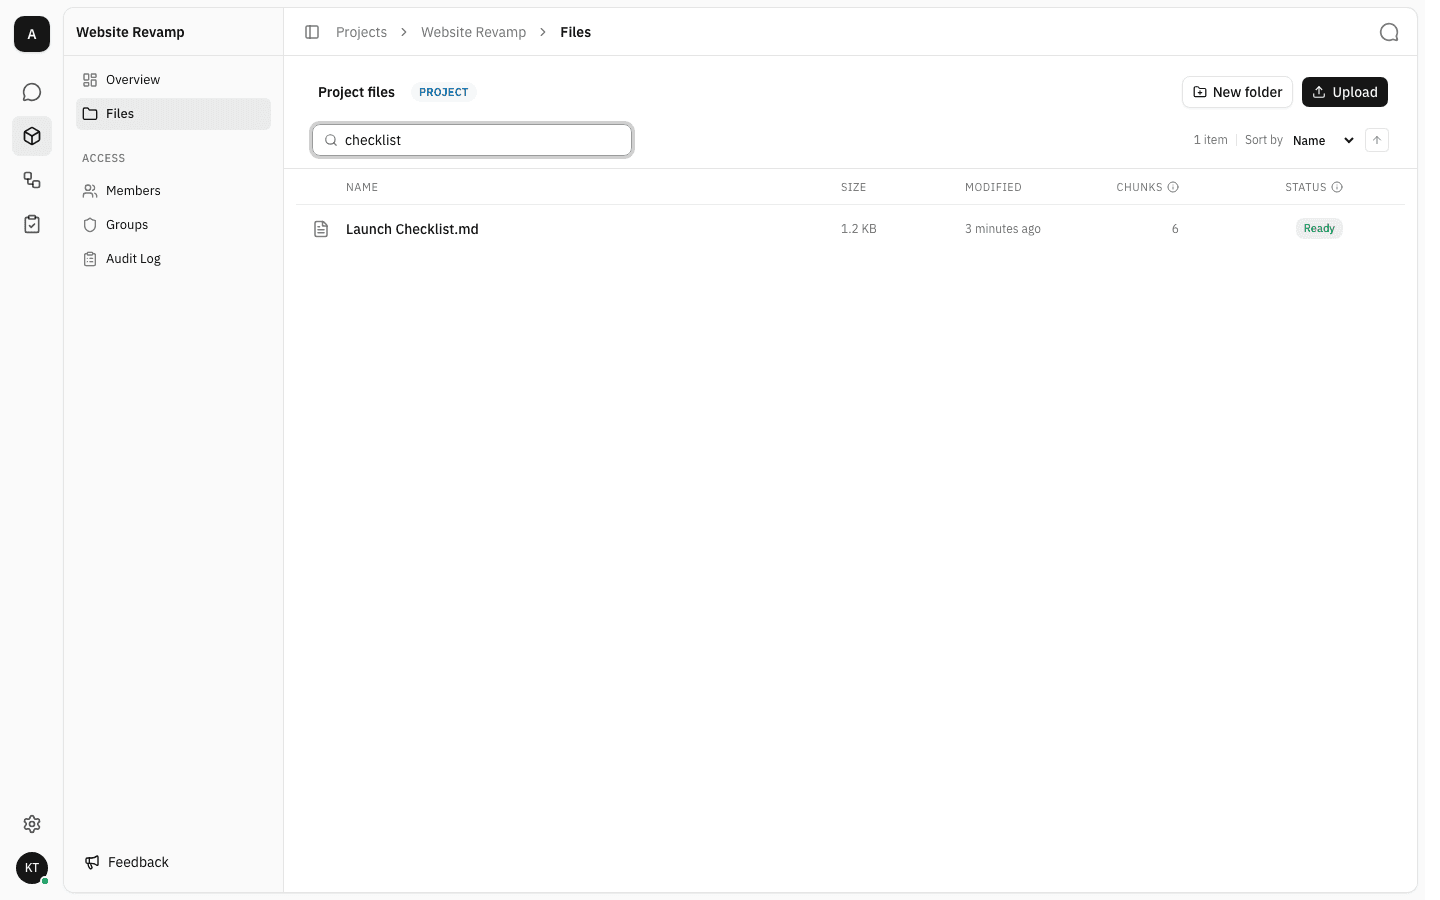
The item count next to Sort by always reflects what is on screen. You can also sort by name, modified date or size, and flip the direction with the arrow button.
Download or delete
-
Double-click a file, or choose Download from its … menu. Images open in a preview window; every other file type downloads.
-
To remove something, choose Delete from its … menu and confirm.
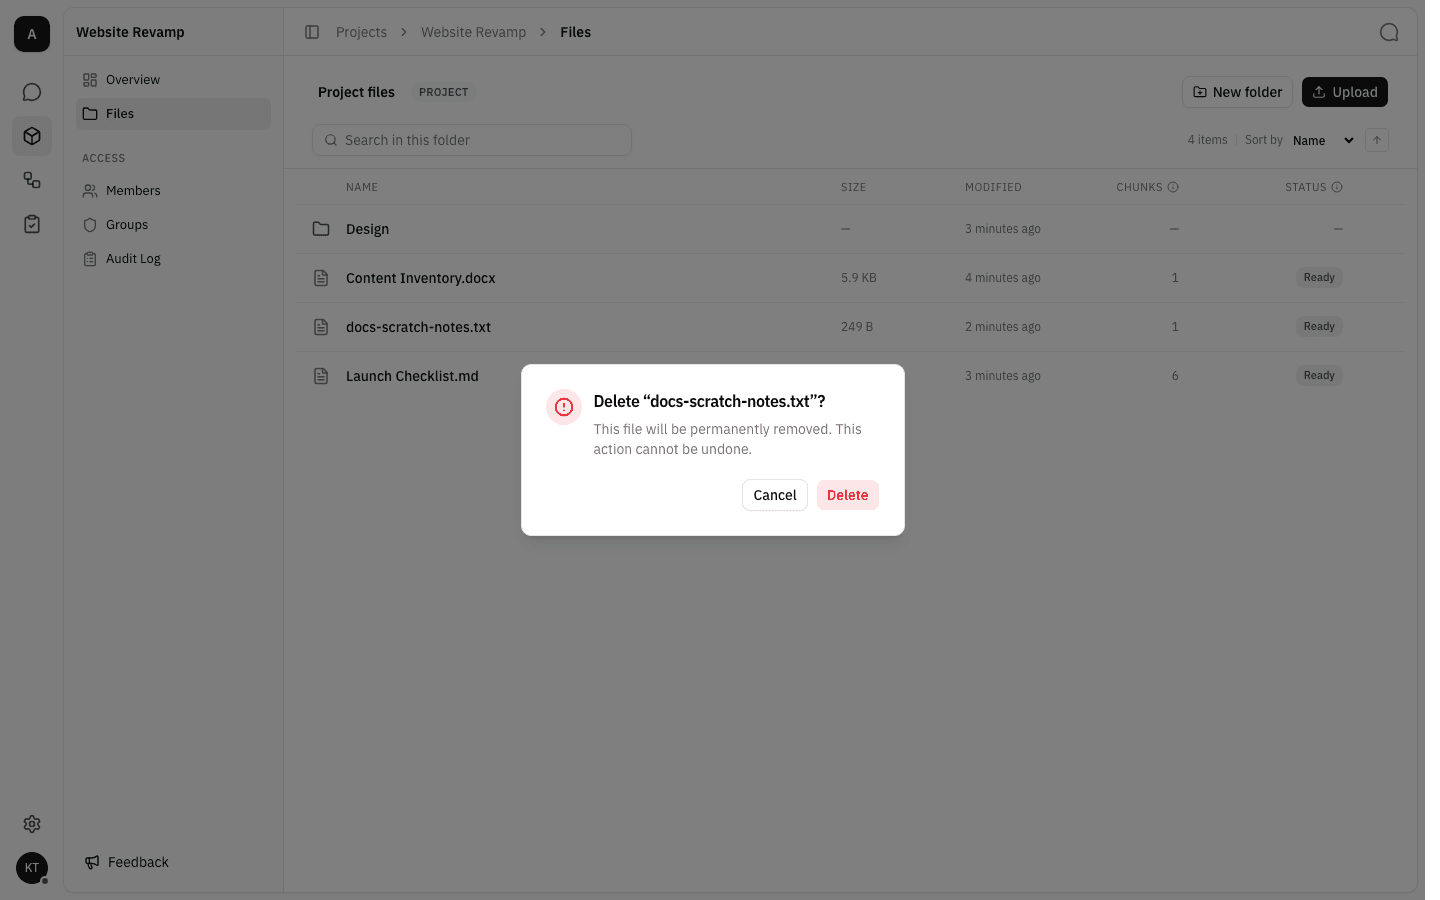
Deleting is permanent — there is no recycle bin. Deleting a folder also removes everything inside it, so check the contents first. Deleting a document also removes it from the assistant's search index.
Ask the assistant about them
Project documents are searchable the moment they reach Ready, and the chat panel is available without leaving the page.
-
Click the chat icon in the top-right corner of the page to open the side panel, then open Focus on knowledge in the composer. The project's own documents are listed first; tick the ones the answer should be based on.
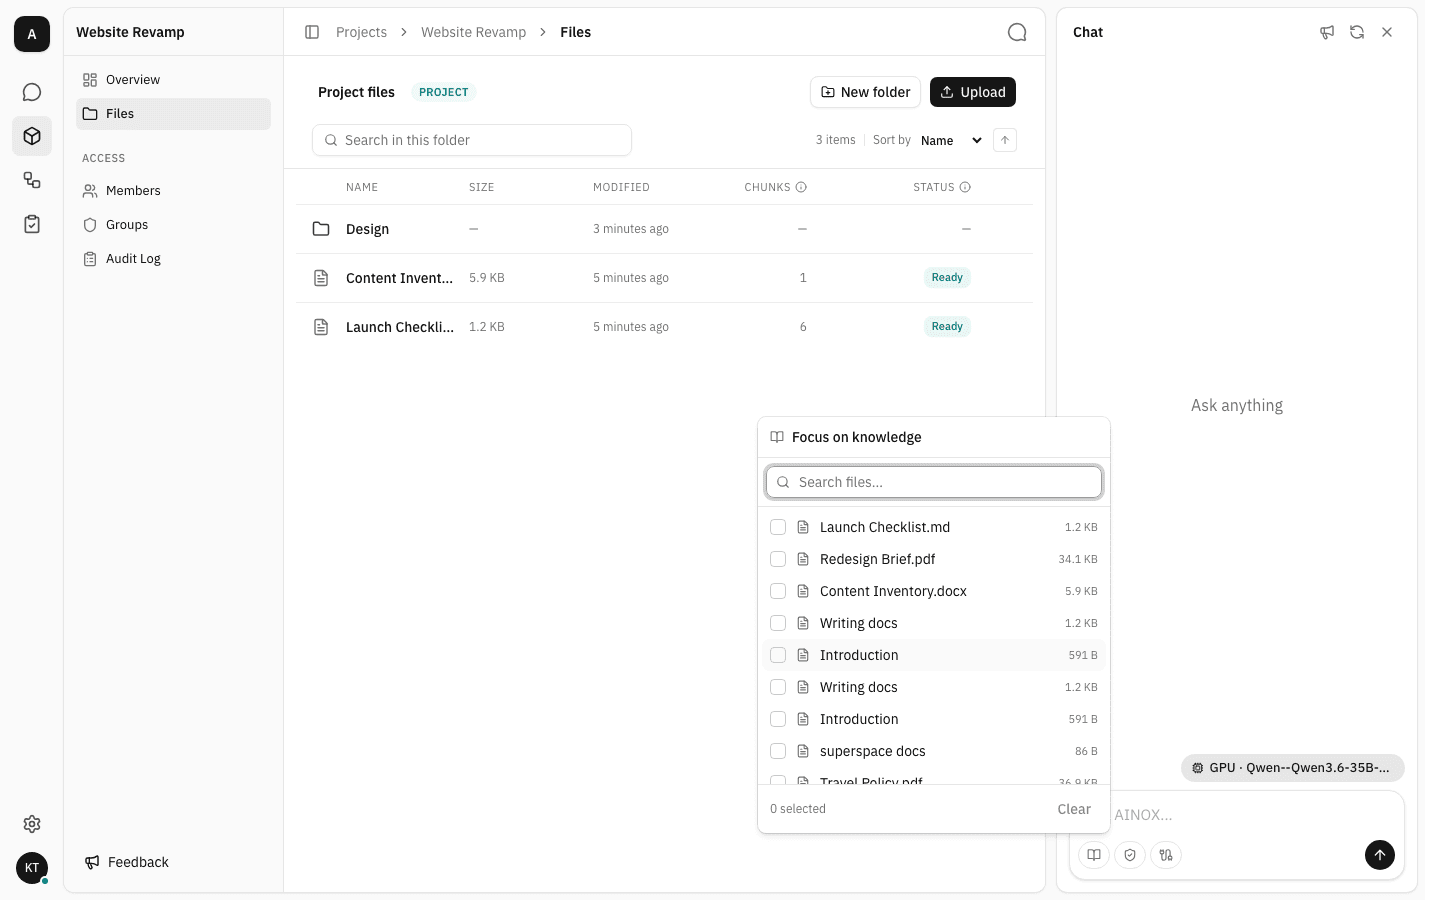
The picker lists everything you can reach, not only this project — workspace files and synced documents appear further down the list. Focusing is optional: without it the assistant searches everything you have access to.
-
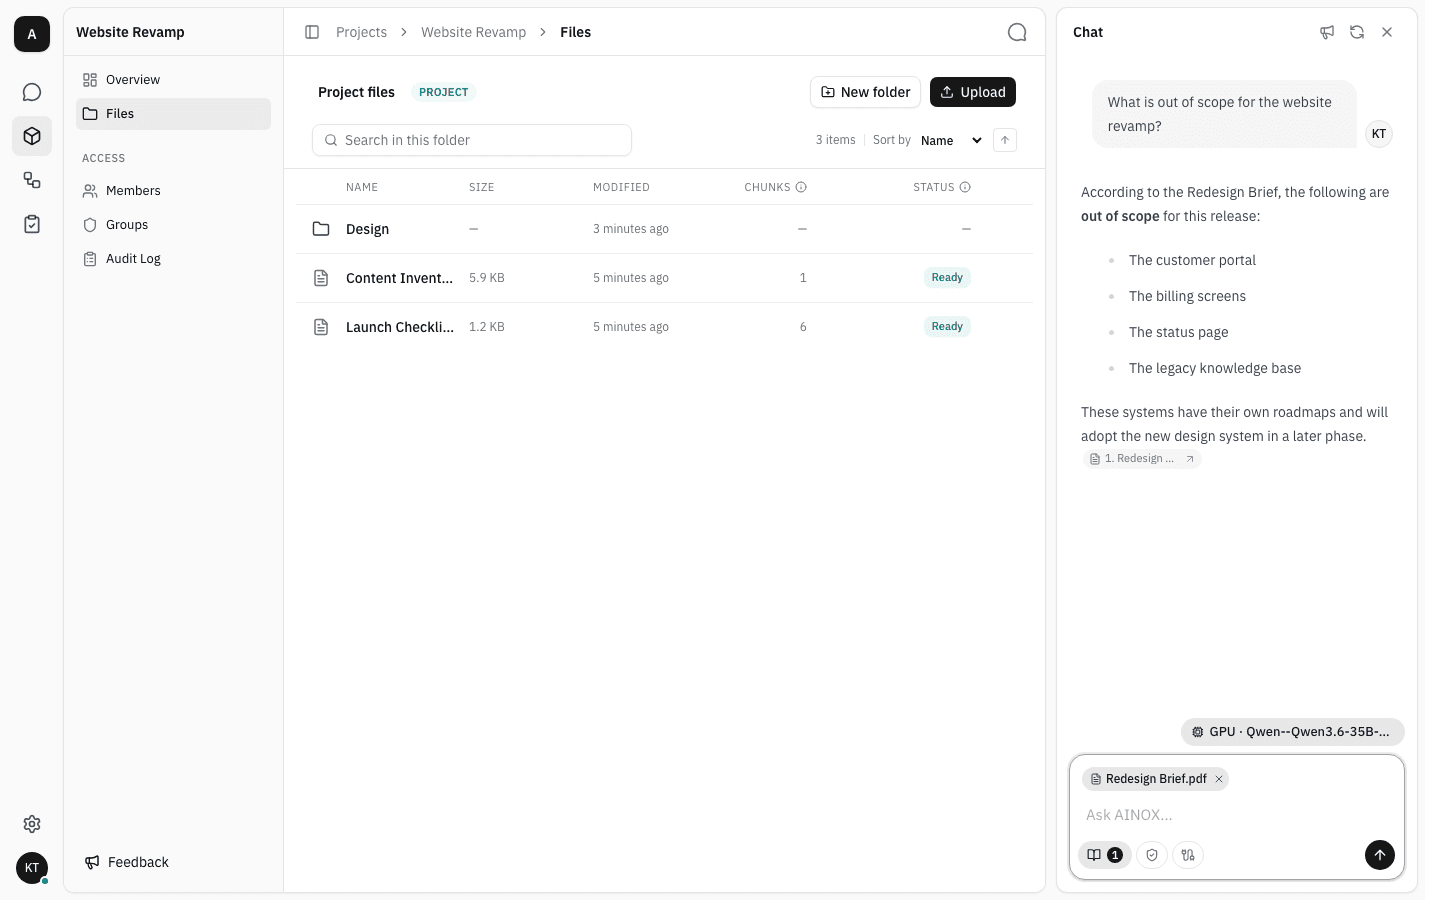
Ask the question. The answer is drawn from the focused document and carries a citation chip you can click to open the source.
Notes
- Access follows the project. Adding someone to the project, or to a group with project access, gives them these documents; removing them takes the documents away. Nothing here is visible workspace-wide.
- Workspace admins see the shape, not the contents. Workspace admins inherit folder management on every project so they can keep the tree tidy, but not the file-content permissions — they cannot upload to or download from a project they are not a member of. Workspace owners additionally inherit listing, moving and deleting so they can audit and clean up.
- Upload limits: up to 20 files per upload, and 100 MB per file. Executables, scripts, HTML, audio and video are rejected; anything skipped is named in a warning.
- What can be indexed: PDF, Word (
.docx), PowerPoint (.pptx), plain text and Markdown. Other formats are stored and downloadable but not searchable. - Synced items are read-only. Folders and files brought in by a knowledge source carry a Synced badge and a padlock, and cannot be renamed, moved or deleted here.
- Deleting the project deletes its files. There is no way to recover a project's documents afterwards, so move anything worth keeping into Workspace files first.
Project chat
A project's own assistant — ask questions about that project's documents, in conversations that live inside the project.
Project members & roles
Control who can open a project by adding workspace members to it, hand the project over to someone else, and remove access when it is no longer needed.